

How to Take Great C-Section Photos

As I look back on my daughter's first year of life, I remember a lot of things, including that jumbled confusing time right before I gave birth where I had so much going through my mind, but honestly, the bad is getting fuzzier and fuzzier with time, and I'm forever grateful for that. A big reason I can look back on my stressful delivery day with tingly feel-good vibes, besides the fact that we got our daughter out of it, is that I had emotional and beautiful pictures from all of the big moments that day. I cherish those photos, and because I had a c-section, they contain moments that I wasn't present for, or wasn't in the right state of mind to even know were happening right next to me. I know the trend of having a photographer in the delivery room is becoming more and more commonplace, but what about those of us who are uncomfortable with having a photographer in the room, or don't have the budget for one, or have one, but get rushed in for an emergency c-section and the photographer isn't allowed to follow? Those women deserve great photos, too.
If you are in those last phases of pregnancy, I highly recommend looking up some tricks of the trade for DIY delivery photos. There are lots of resources online, including this article, which helped refresh my memory while I was sitting at home on maternity leave waiting for my daughter's imminent arrival. However, most resources will only give you tips for vaginal delivery, but for one reason or another, you may have a c-section, and that's a whole different ball of wax. I actually had a scheduled c-section that I knew was coming a few weeks prior, so I had plenty of time to research, but I found almost nothing about what the OR would and would not allow. So...take a moment and read this over, even if you are sure you are going to go all natural, home birth in a bathtub, because you never know what can happen, and for me, it helped to feel prepared for anything.
How to Take Great DIY C-Section Delivery Photos
1. Prepare
Make sure you load your camera, the nicest one you have (DSLR preferred, but it can be a normal point and shoot), with a fully charged battery and very large memory card. I would recommend at least 32 MB. I would also add an extra memory card, an extra battery, a battery charger, and a little camera cleaning cloth to your bag. Your partner will be worrying about taking the photos, as well as supporting you in the delivery room, and tending to this brand new life while you get stitched up, so they will have no time to delete photos off of a full memory card or look for another battery.
2. Teach your partner the basics
In general, I find that most women take the photos in the family. That's not to say that your partner isn't the camera whizz in the family, they may be, but normally, they’re not. If this is the case, you will want to teach them the basics, from turning the camera on, to turning on and off the flash, to loading memory cards and batteries, they need to know the basics. Now, keep in mind that I'm a professional photographer and kind of particular about these things, but before I delivered, I taught my husband how to use my camera inside and out. We even had a few mock photo shoots with myself and a little teddy bear so I knew he knew what he was doing. While you may not care to go to that level of preparation, I would recommend giving your partner the camera for an outing and having them take some photos so they can actually practice, and not only have your instructions, but also real world experience using your camera before they go into the delivery room.
3. Invest in a 50 mm lens
If you only have your kit lens (the one that comes with your DSLR), I would highly recommend investing in a 1.8 50 mm lens. They range from $100-$200 depending on your camera brand, and are so worth it. They help your camera get a buttery blurred background, which really helps to eliminate those distracting hospital backgrounds. This lens also has a slight natural zoom, so your partner can pop up above the action and still take a close-up of the baby without getting in everyone's way. I will say that focus is a bit harder at lower apertures because less of the photo is in focus, but if you practice beforehand, you should be able to get the hang of it before delivery!
4. Turn off your flash
Fun fact, the majority of professional cameras have no pop-up flash. That's because we never use them. They are harsh, wash out our subjects, and are so unflattering. The OR is very bright, and the last thing you need is a flash going off in a brand new baby's face. You also don’t want to distract the doctors and nurses trying to do their job.
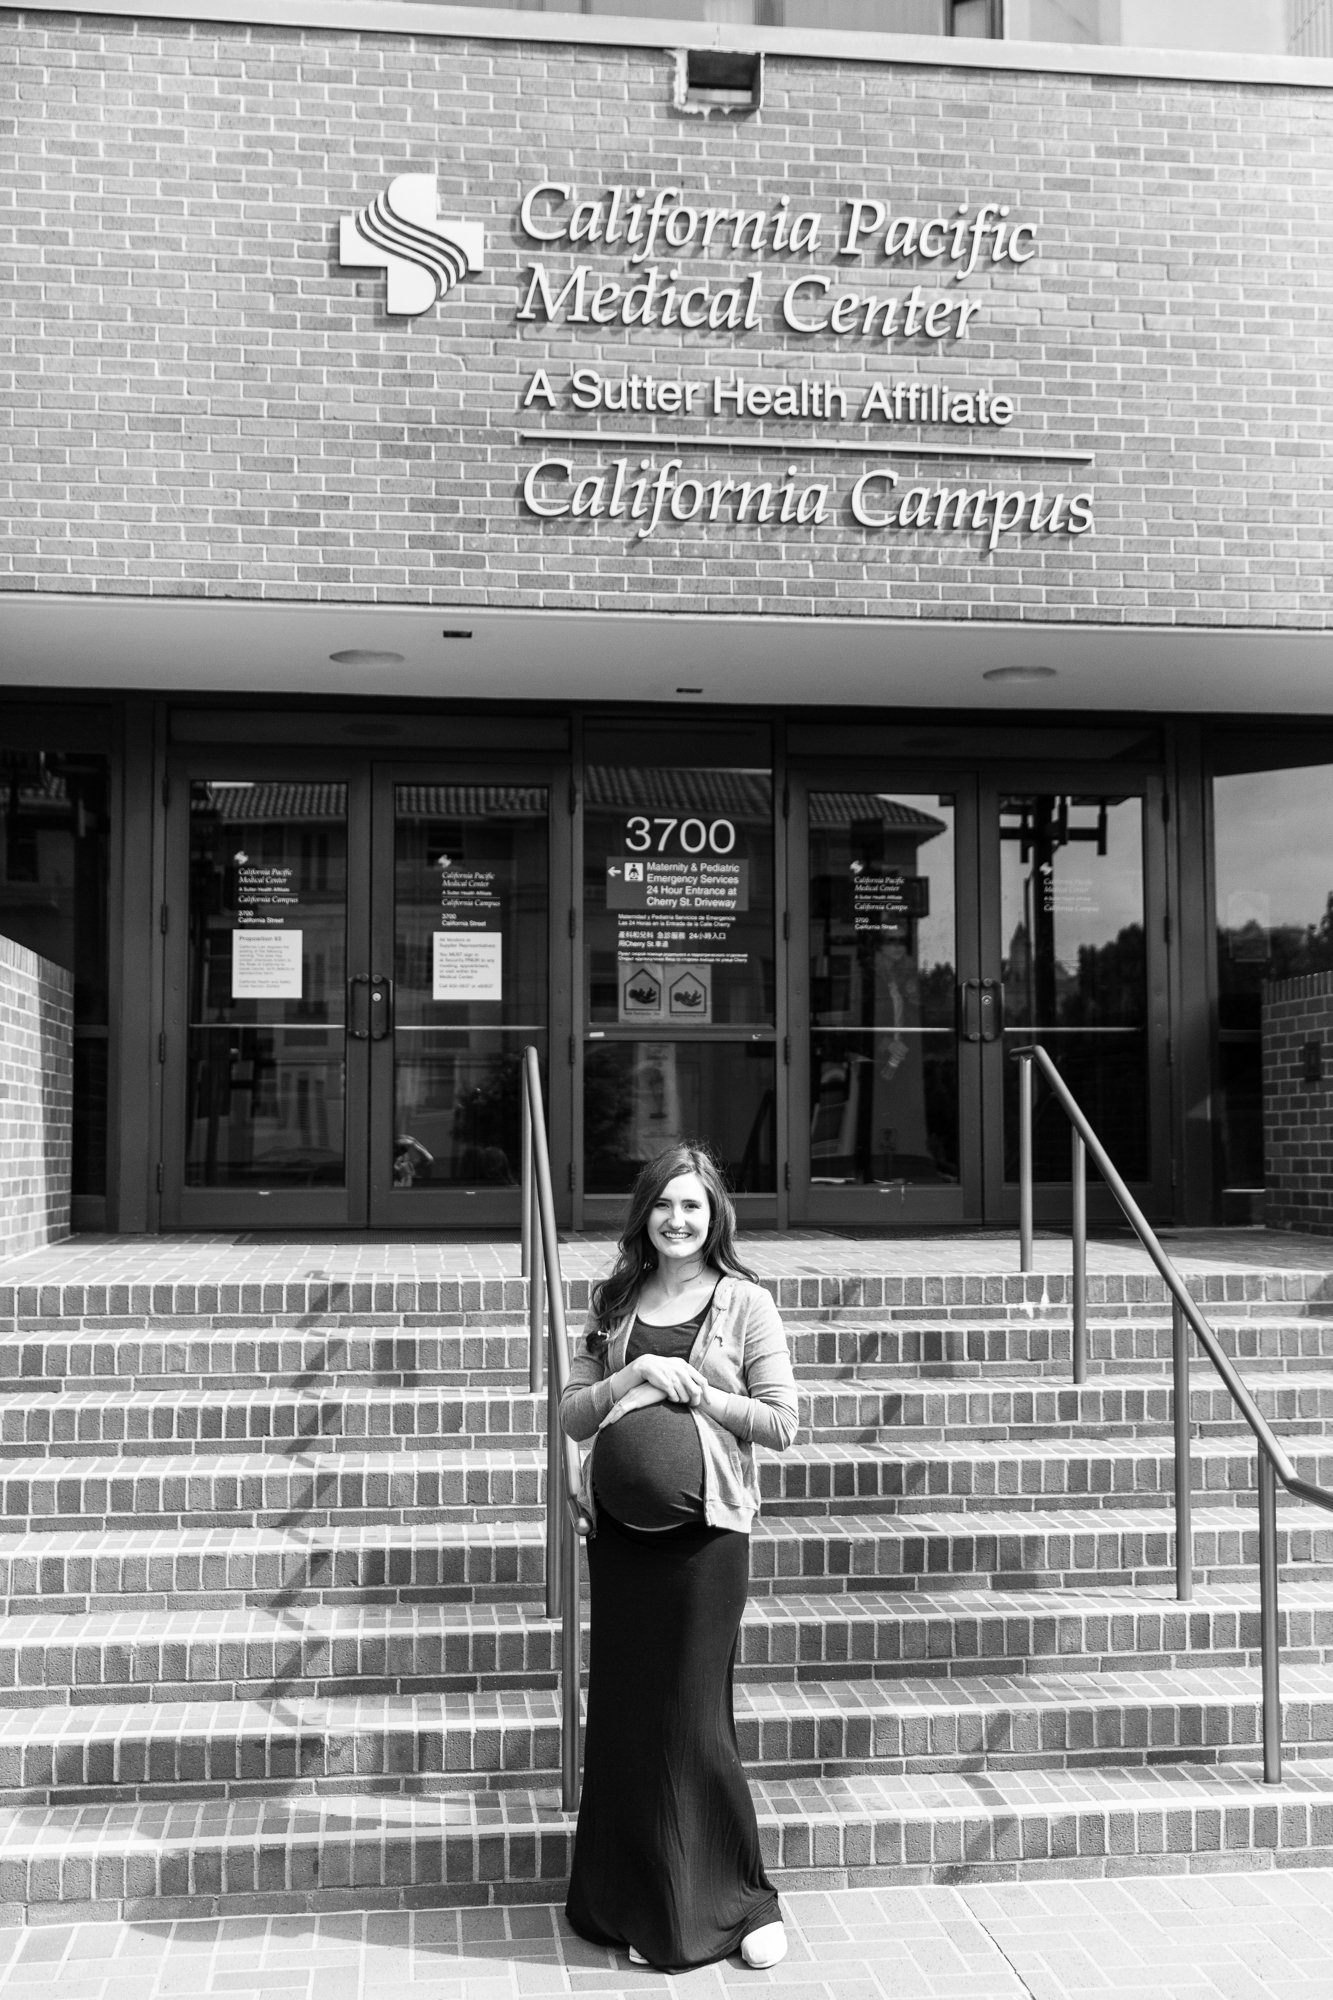
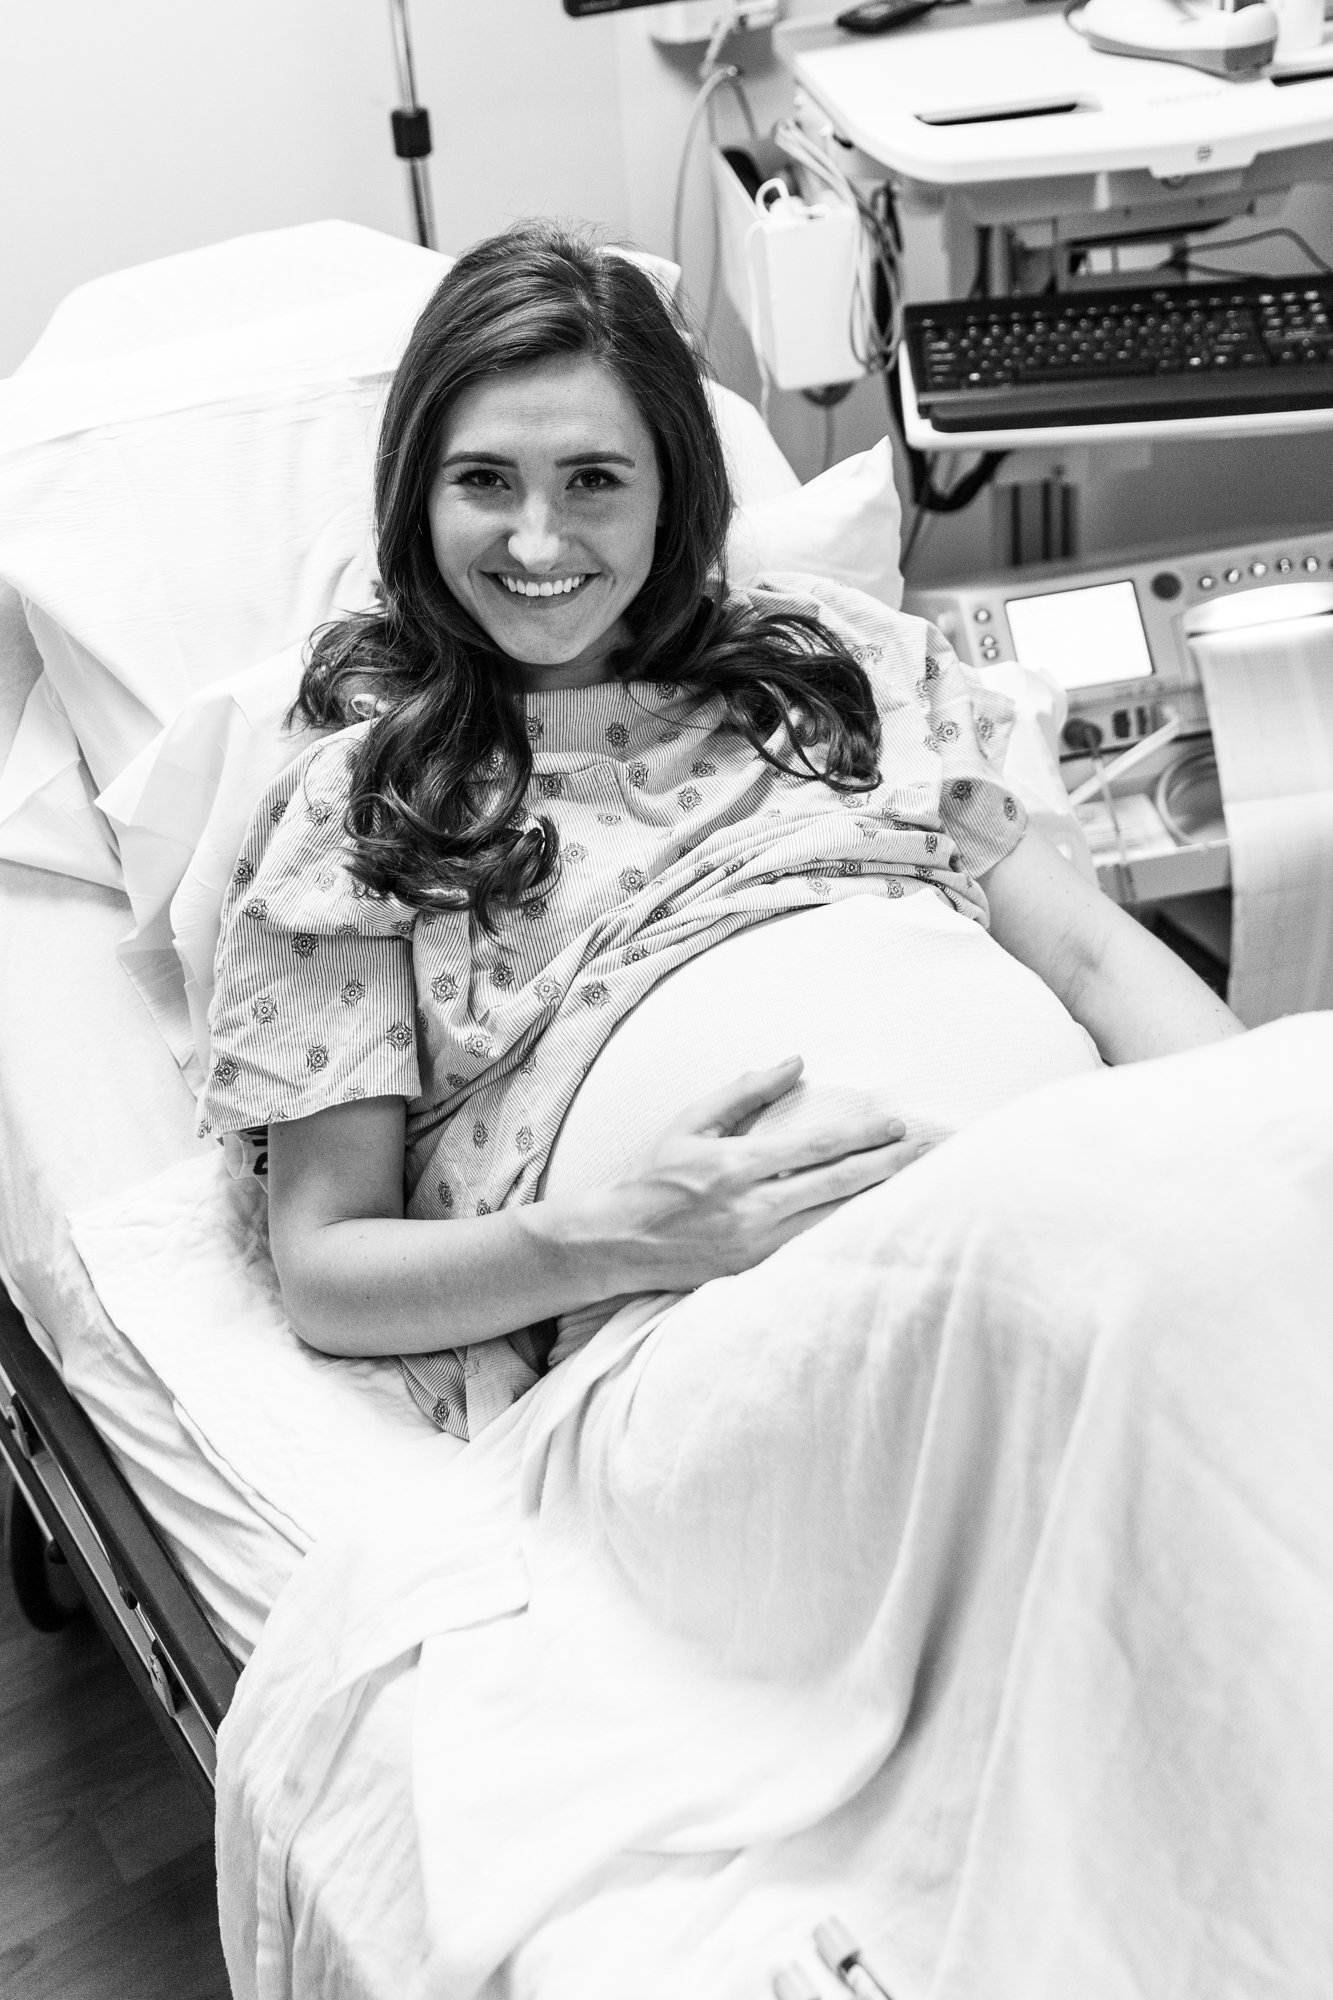
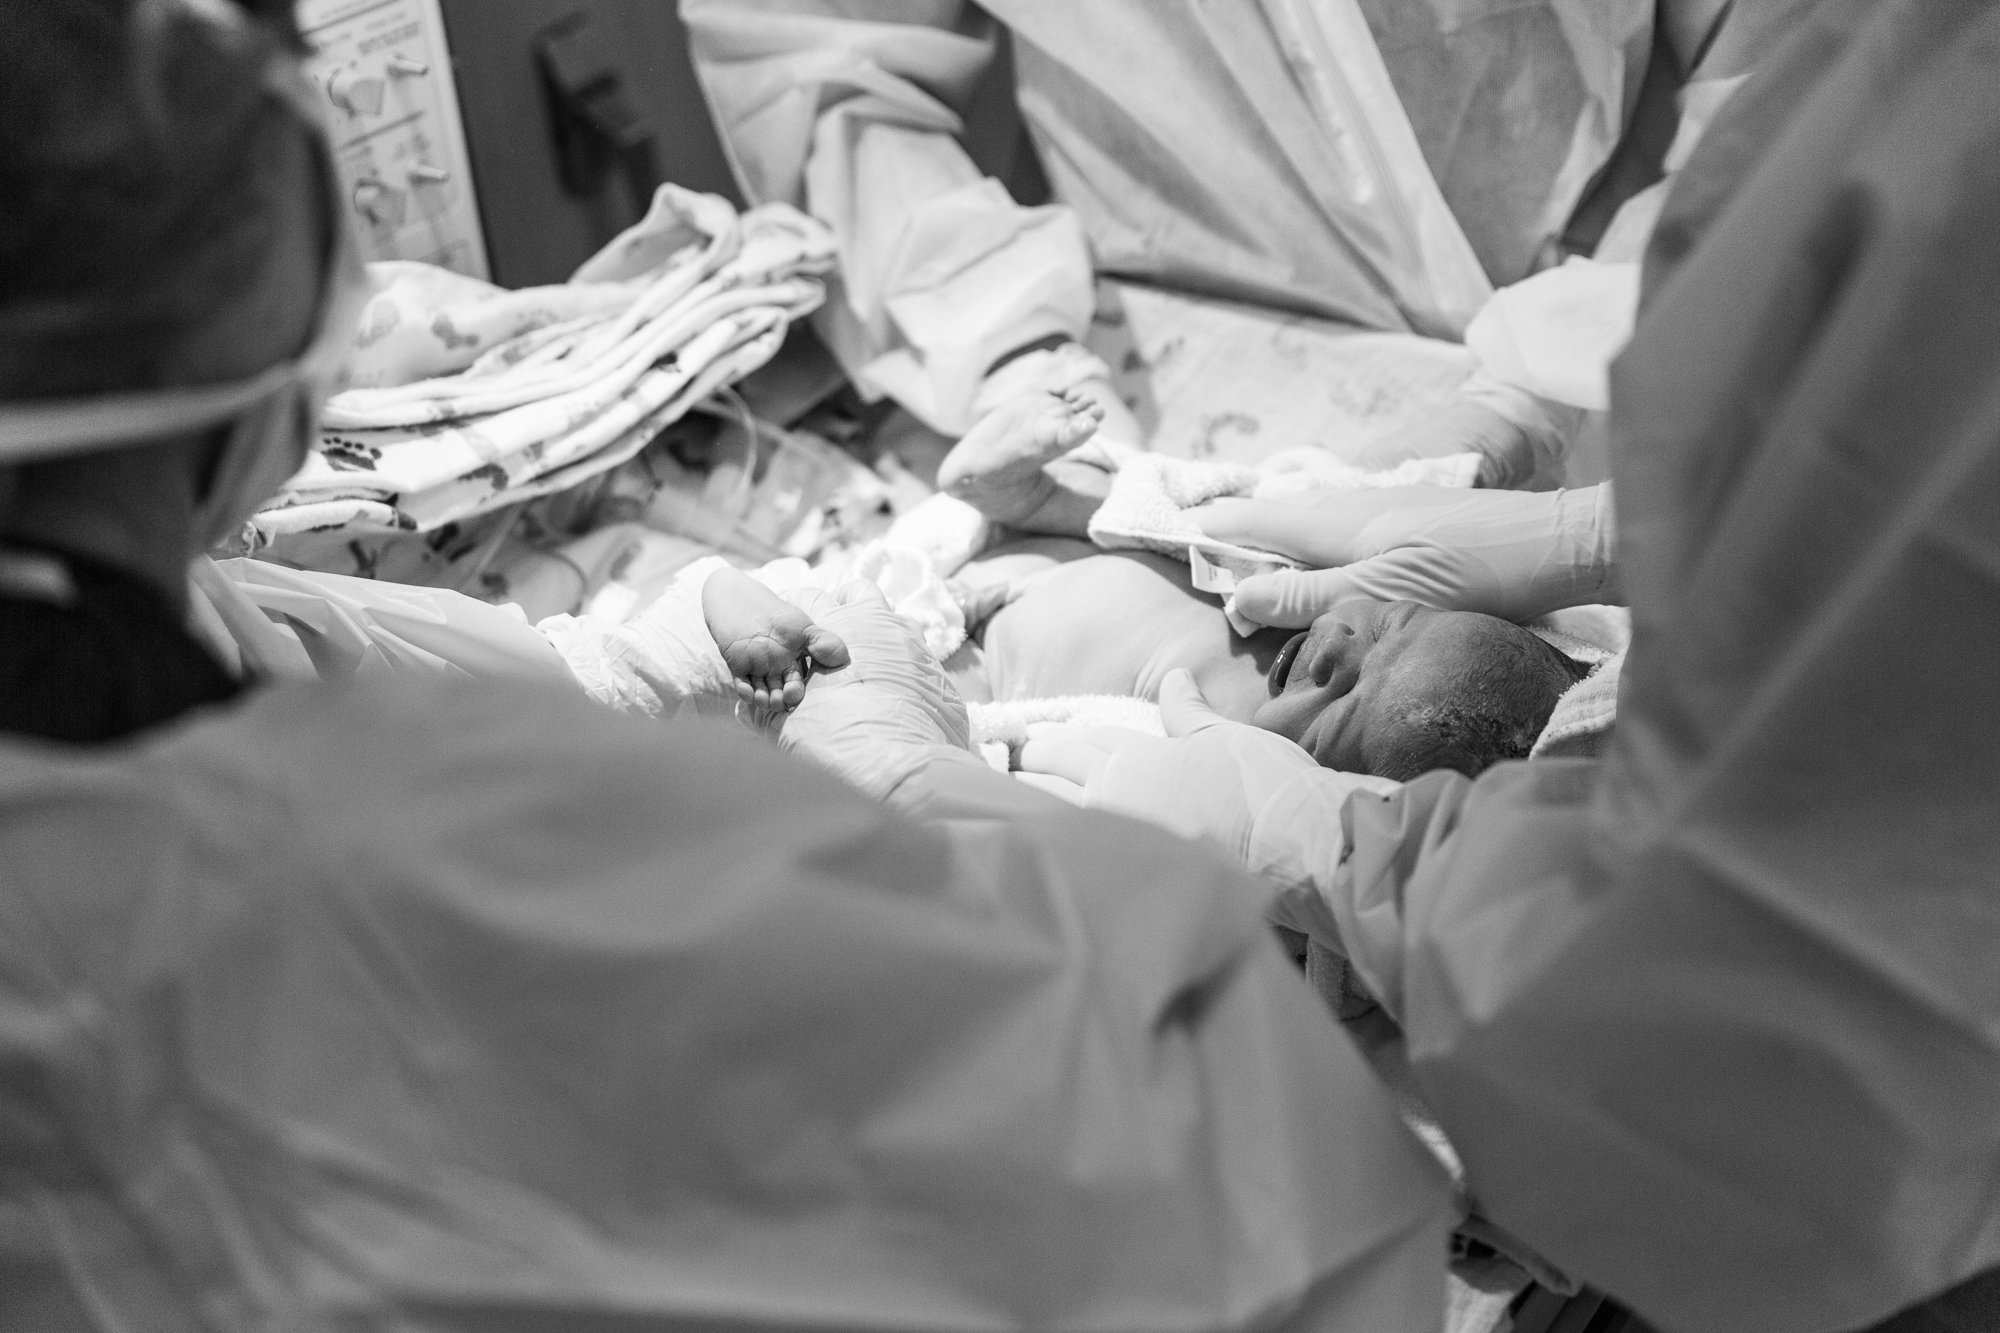
5. Photograph the environment
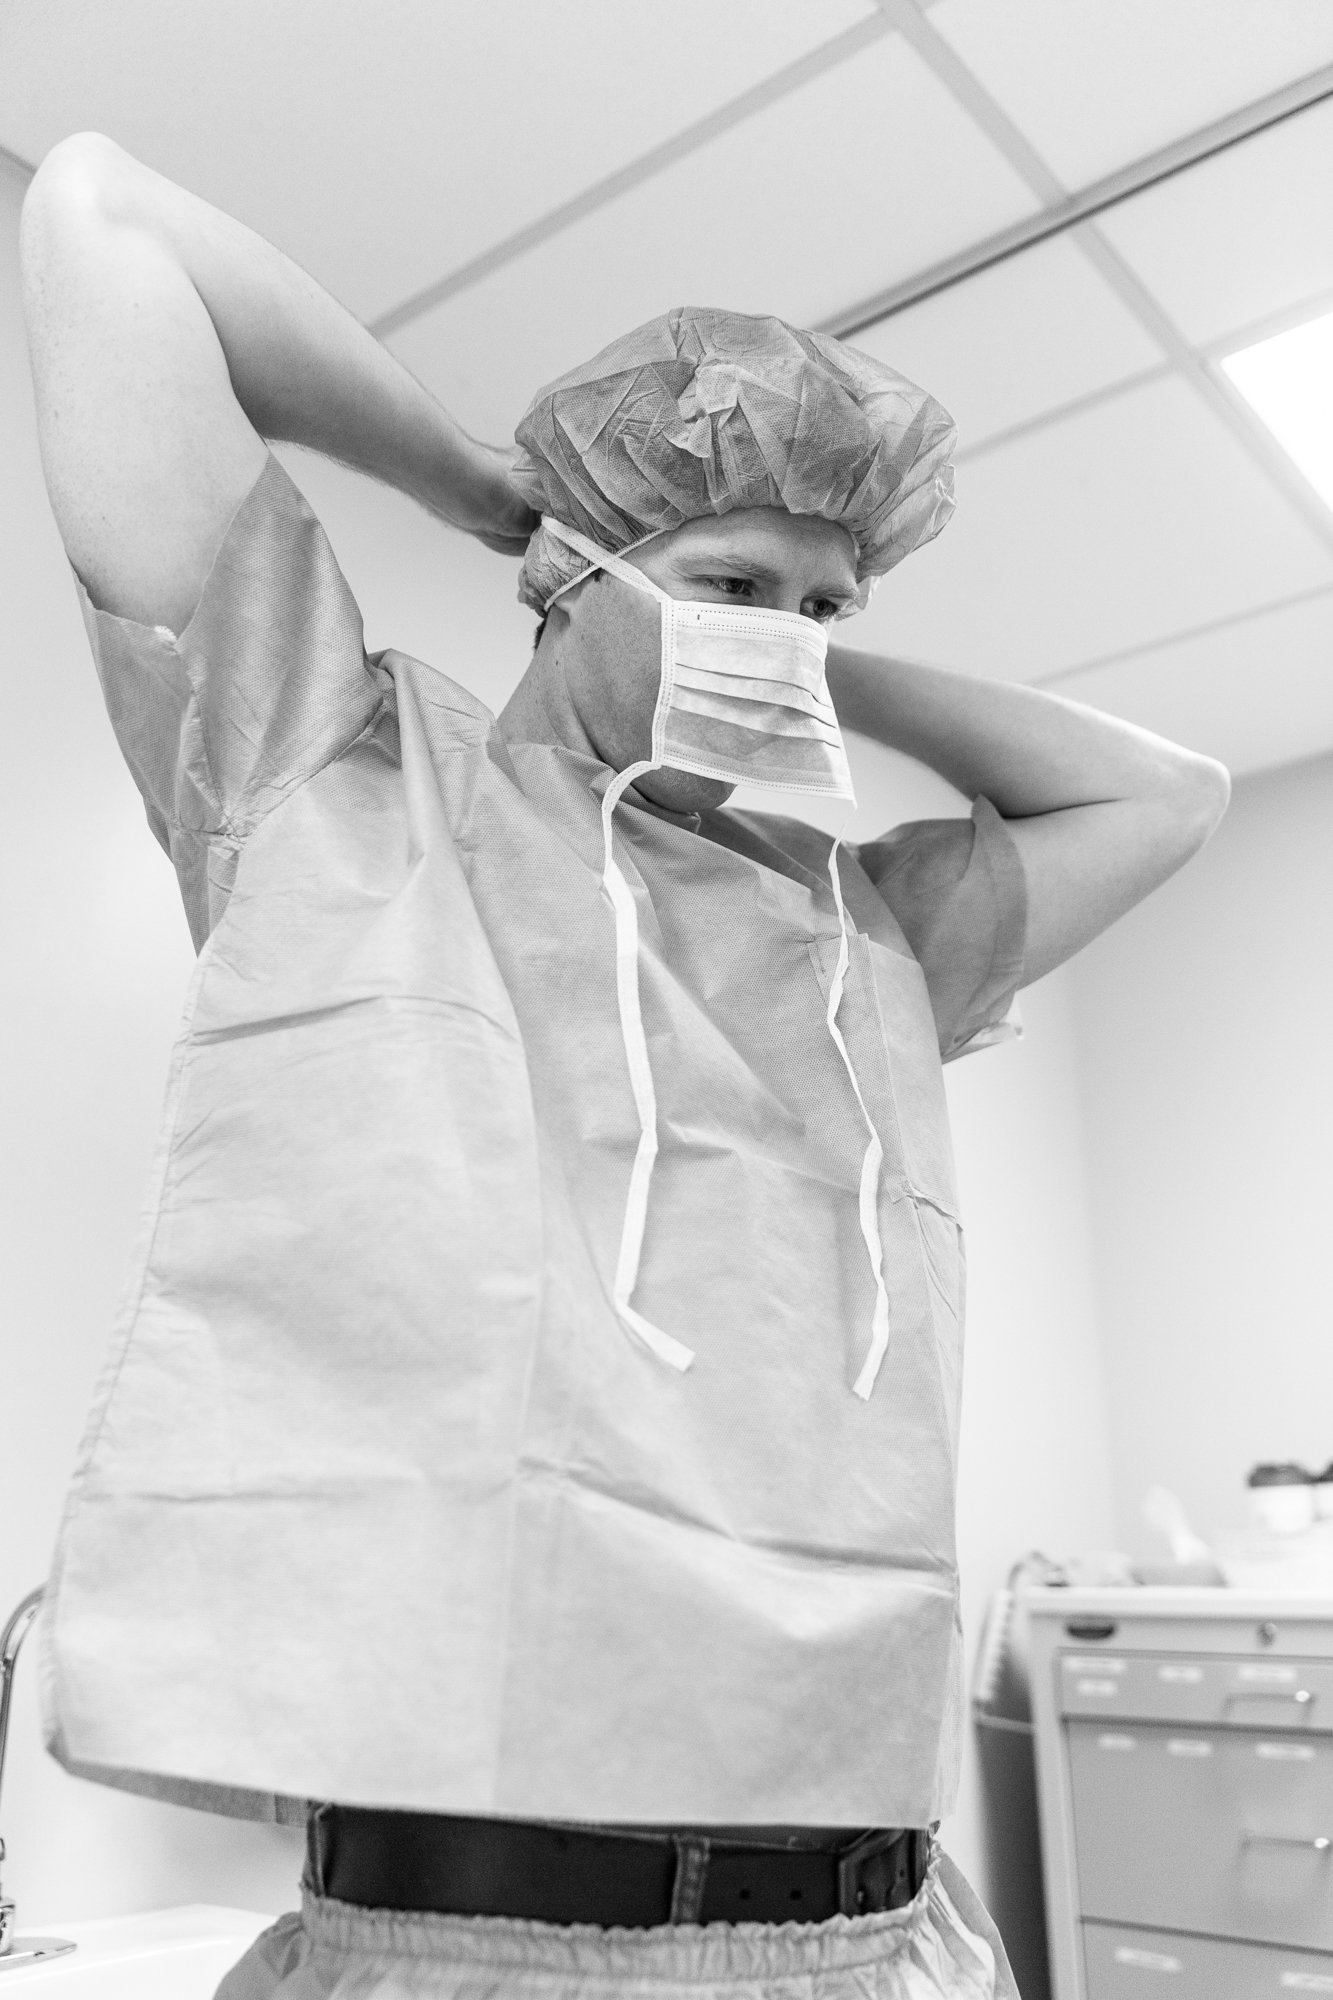
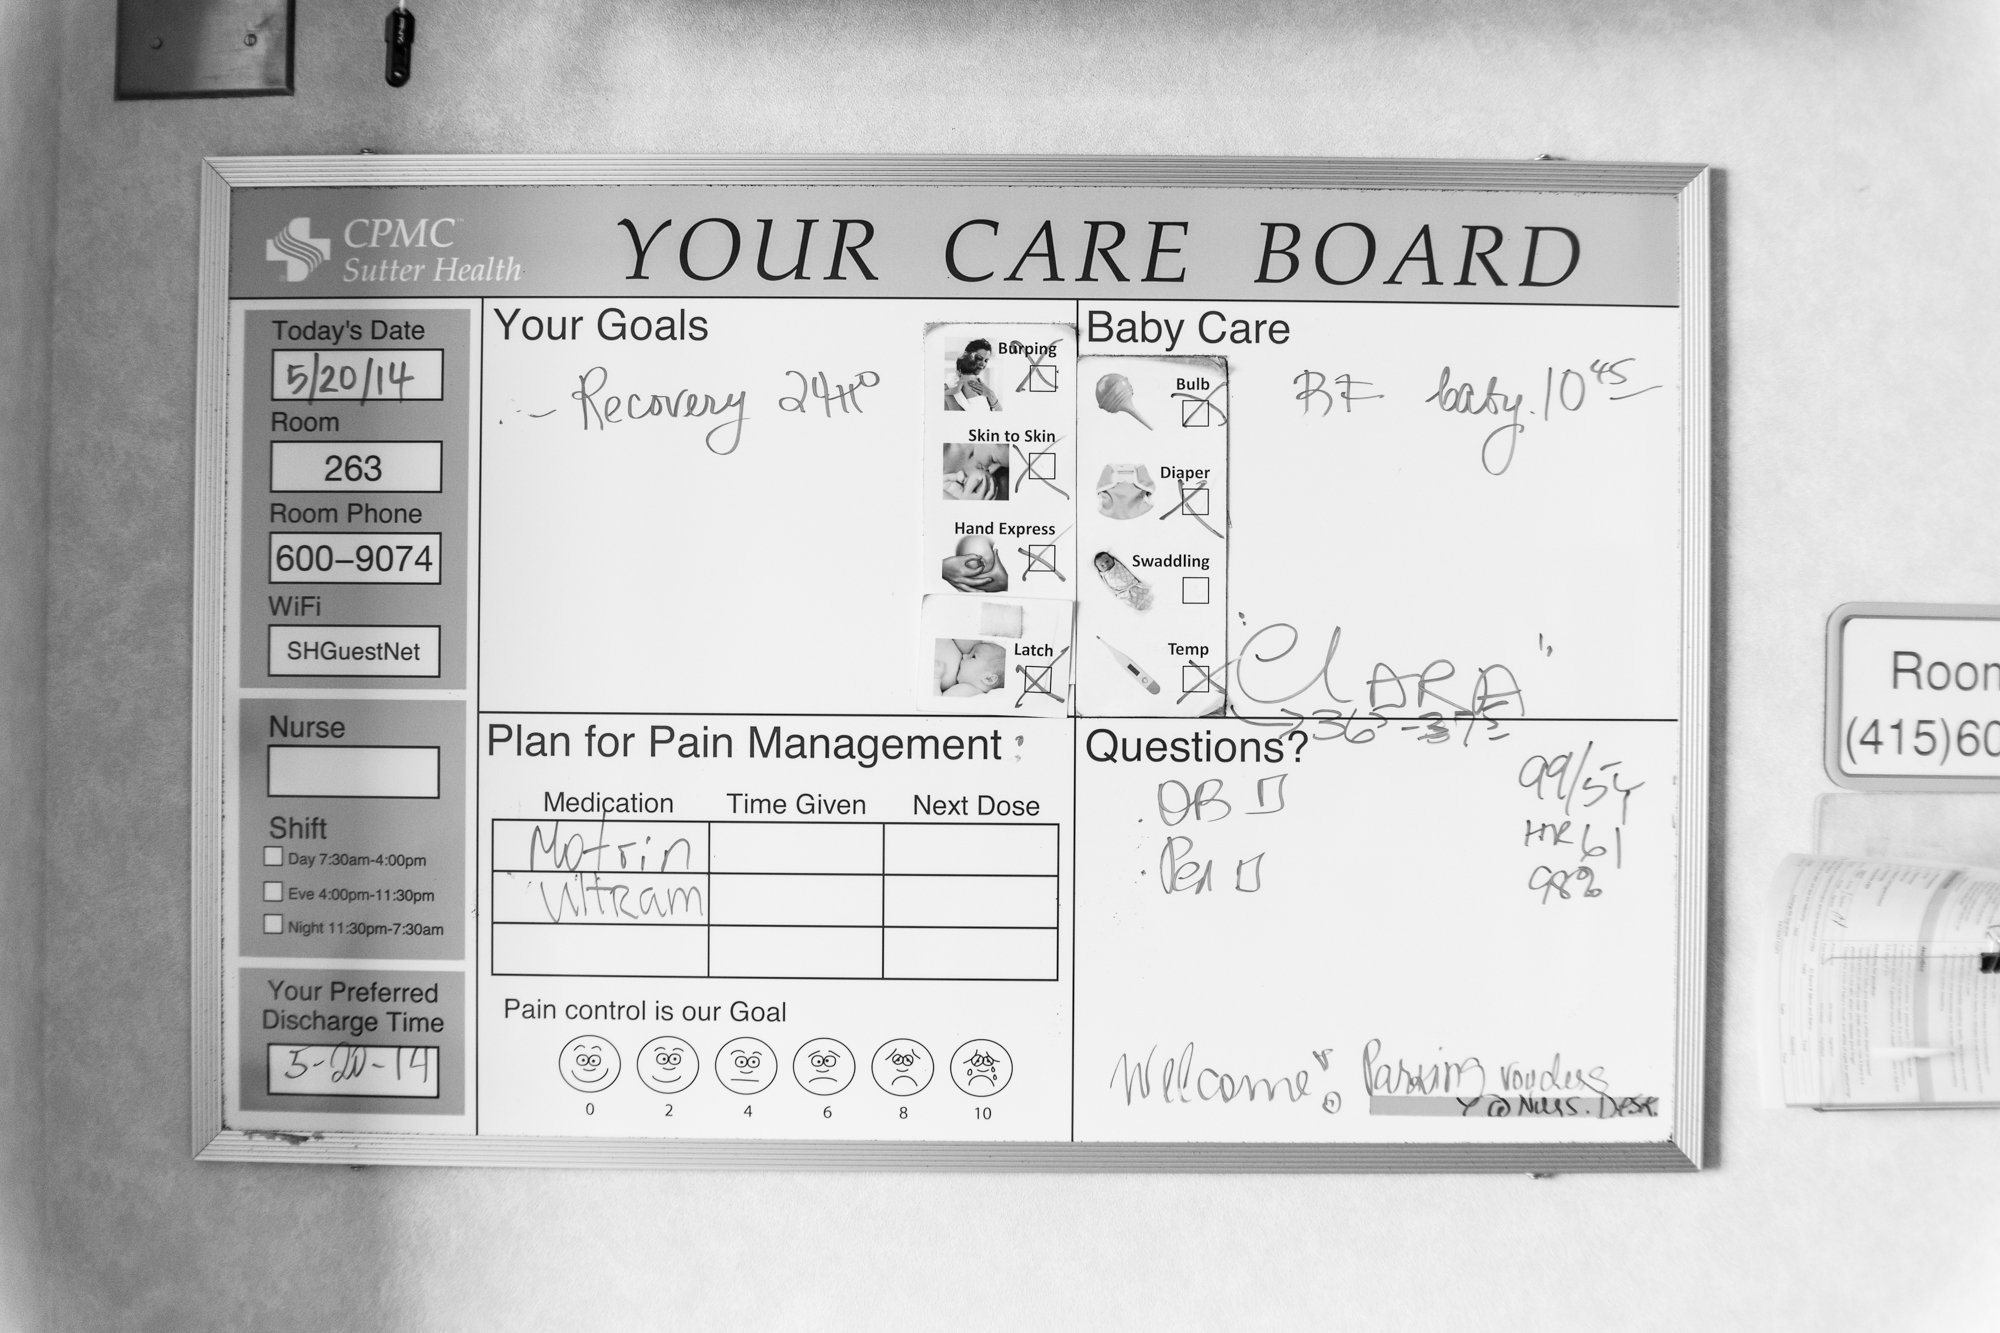
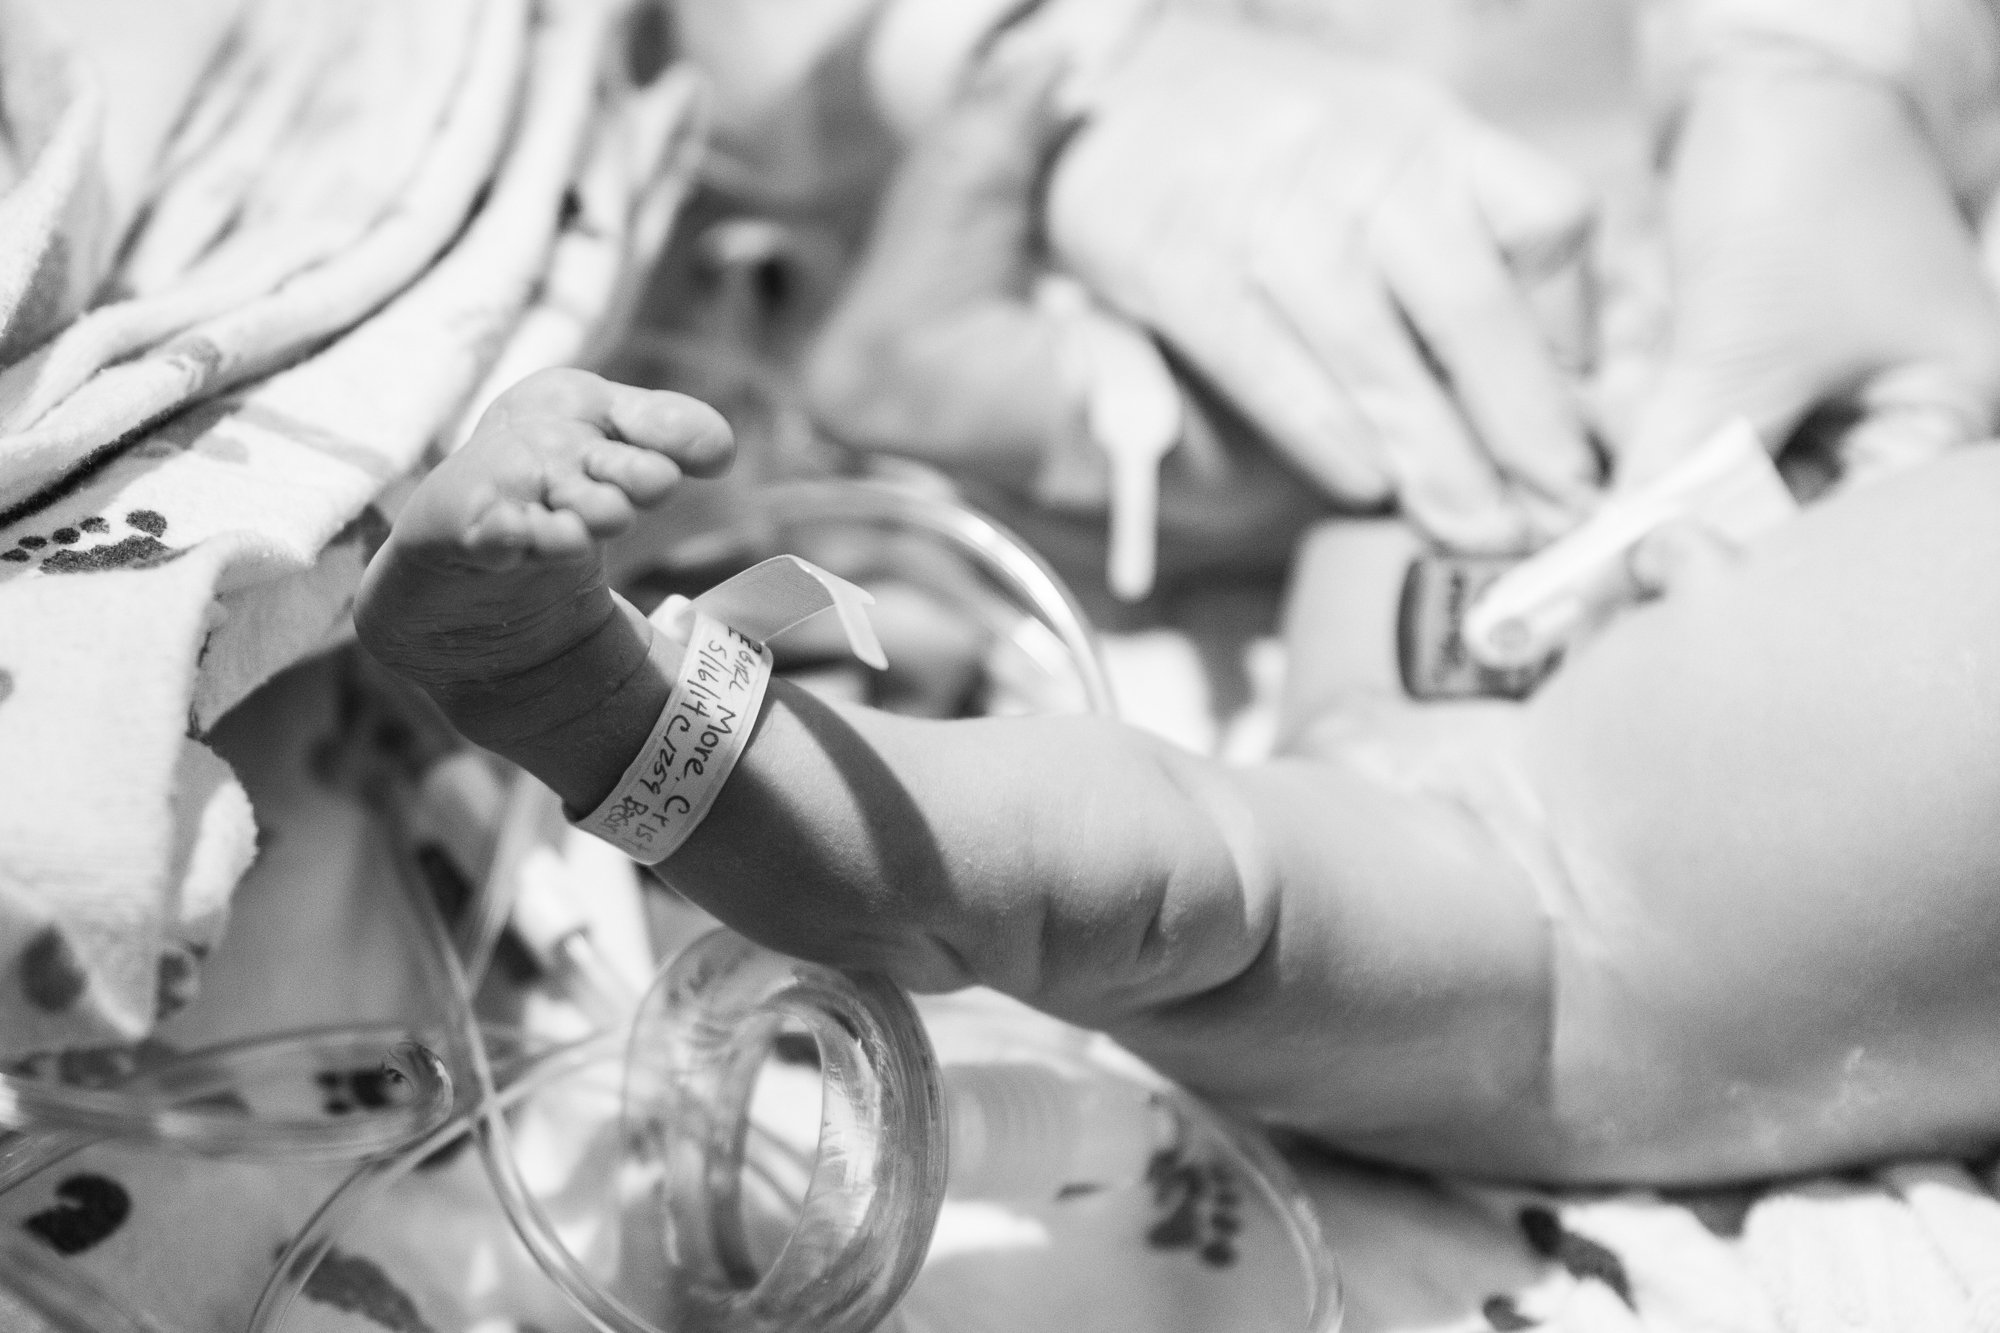
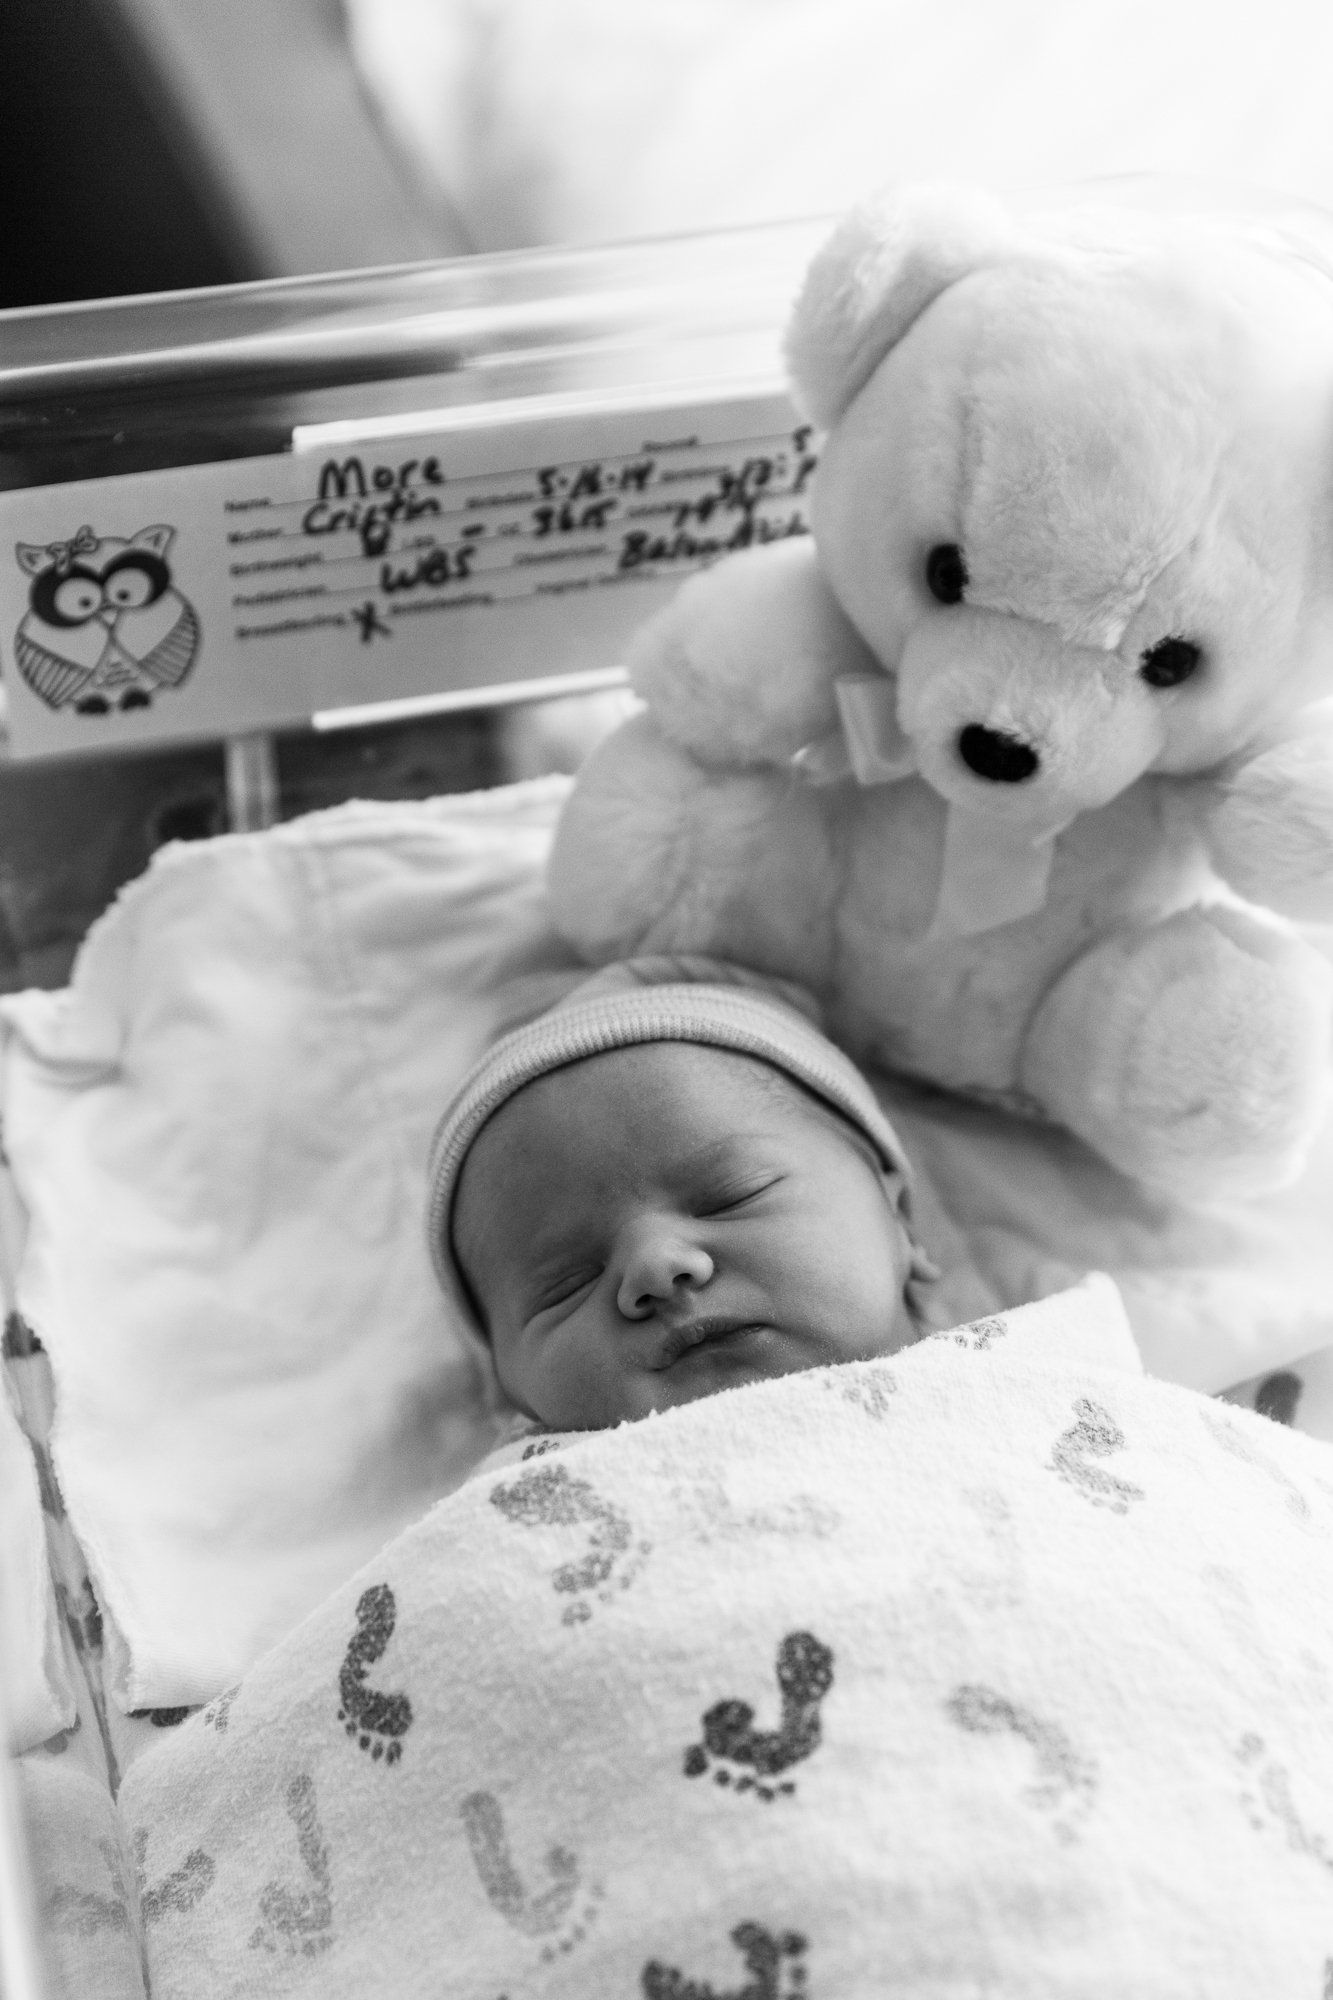
From the preparation, to the recovery room and the OR itself, a c-section is completely different than a vaginal birth. If you have time, document the two of you getting into scrubs and being prepped, the tables they put the baby on, the recovery room and the new baby ankle tags. These are the types of things you are guaranteed to forget later, and while the close-ups of your baby and the new family are so special, the little details about your environment will help paint a more vivid picture later on.

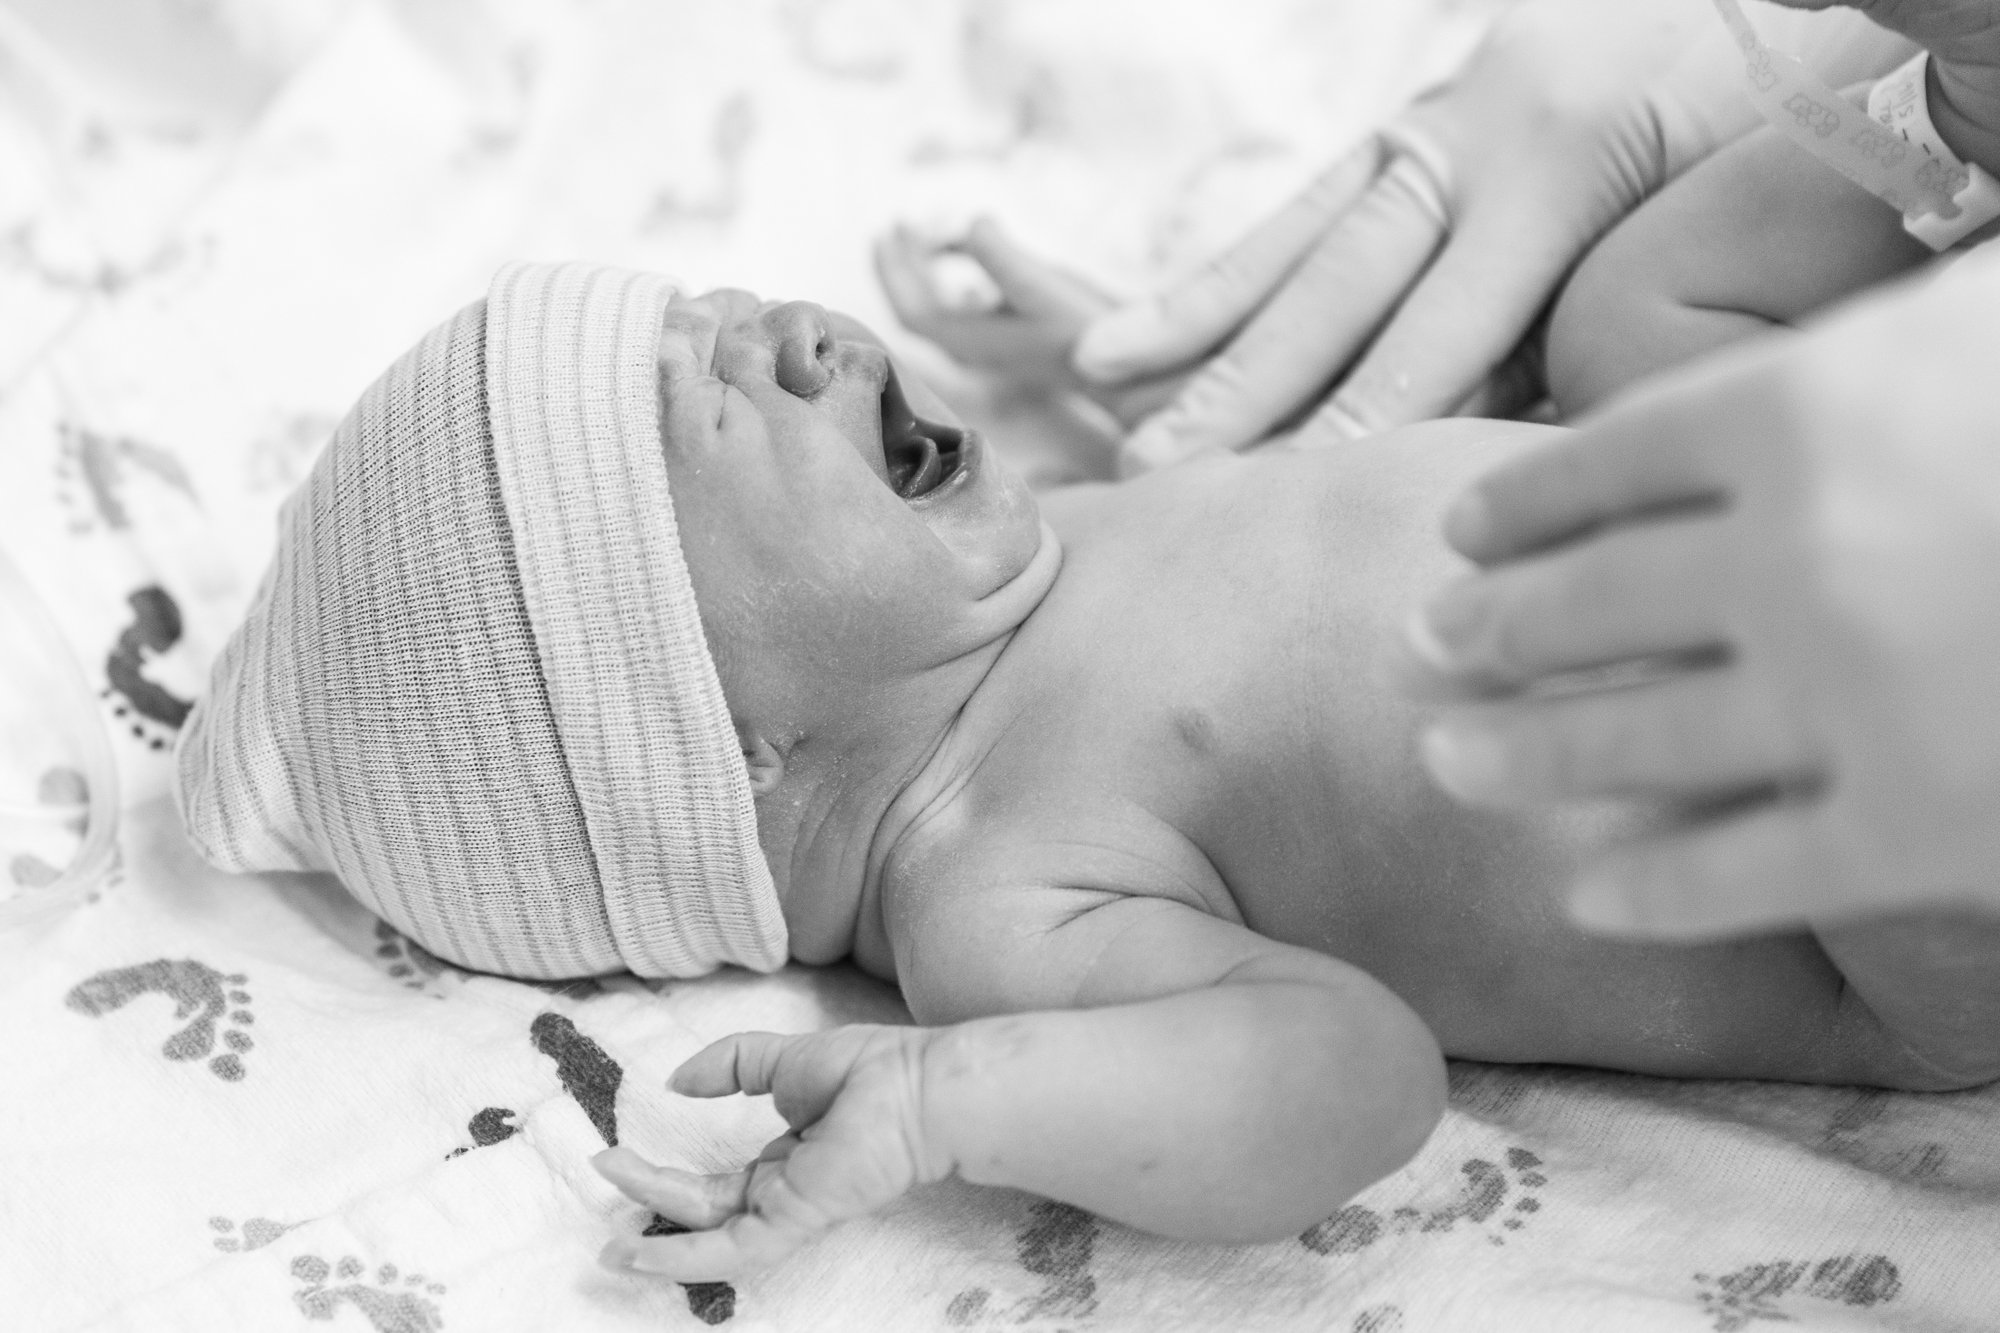
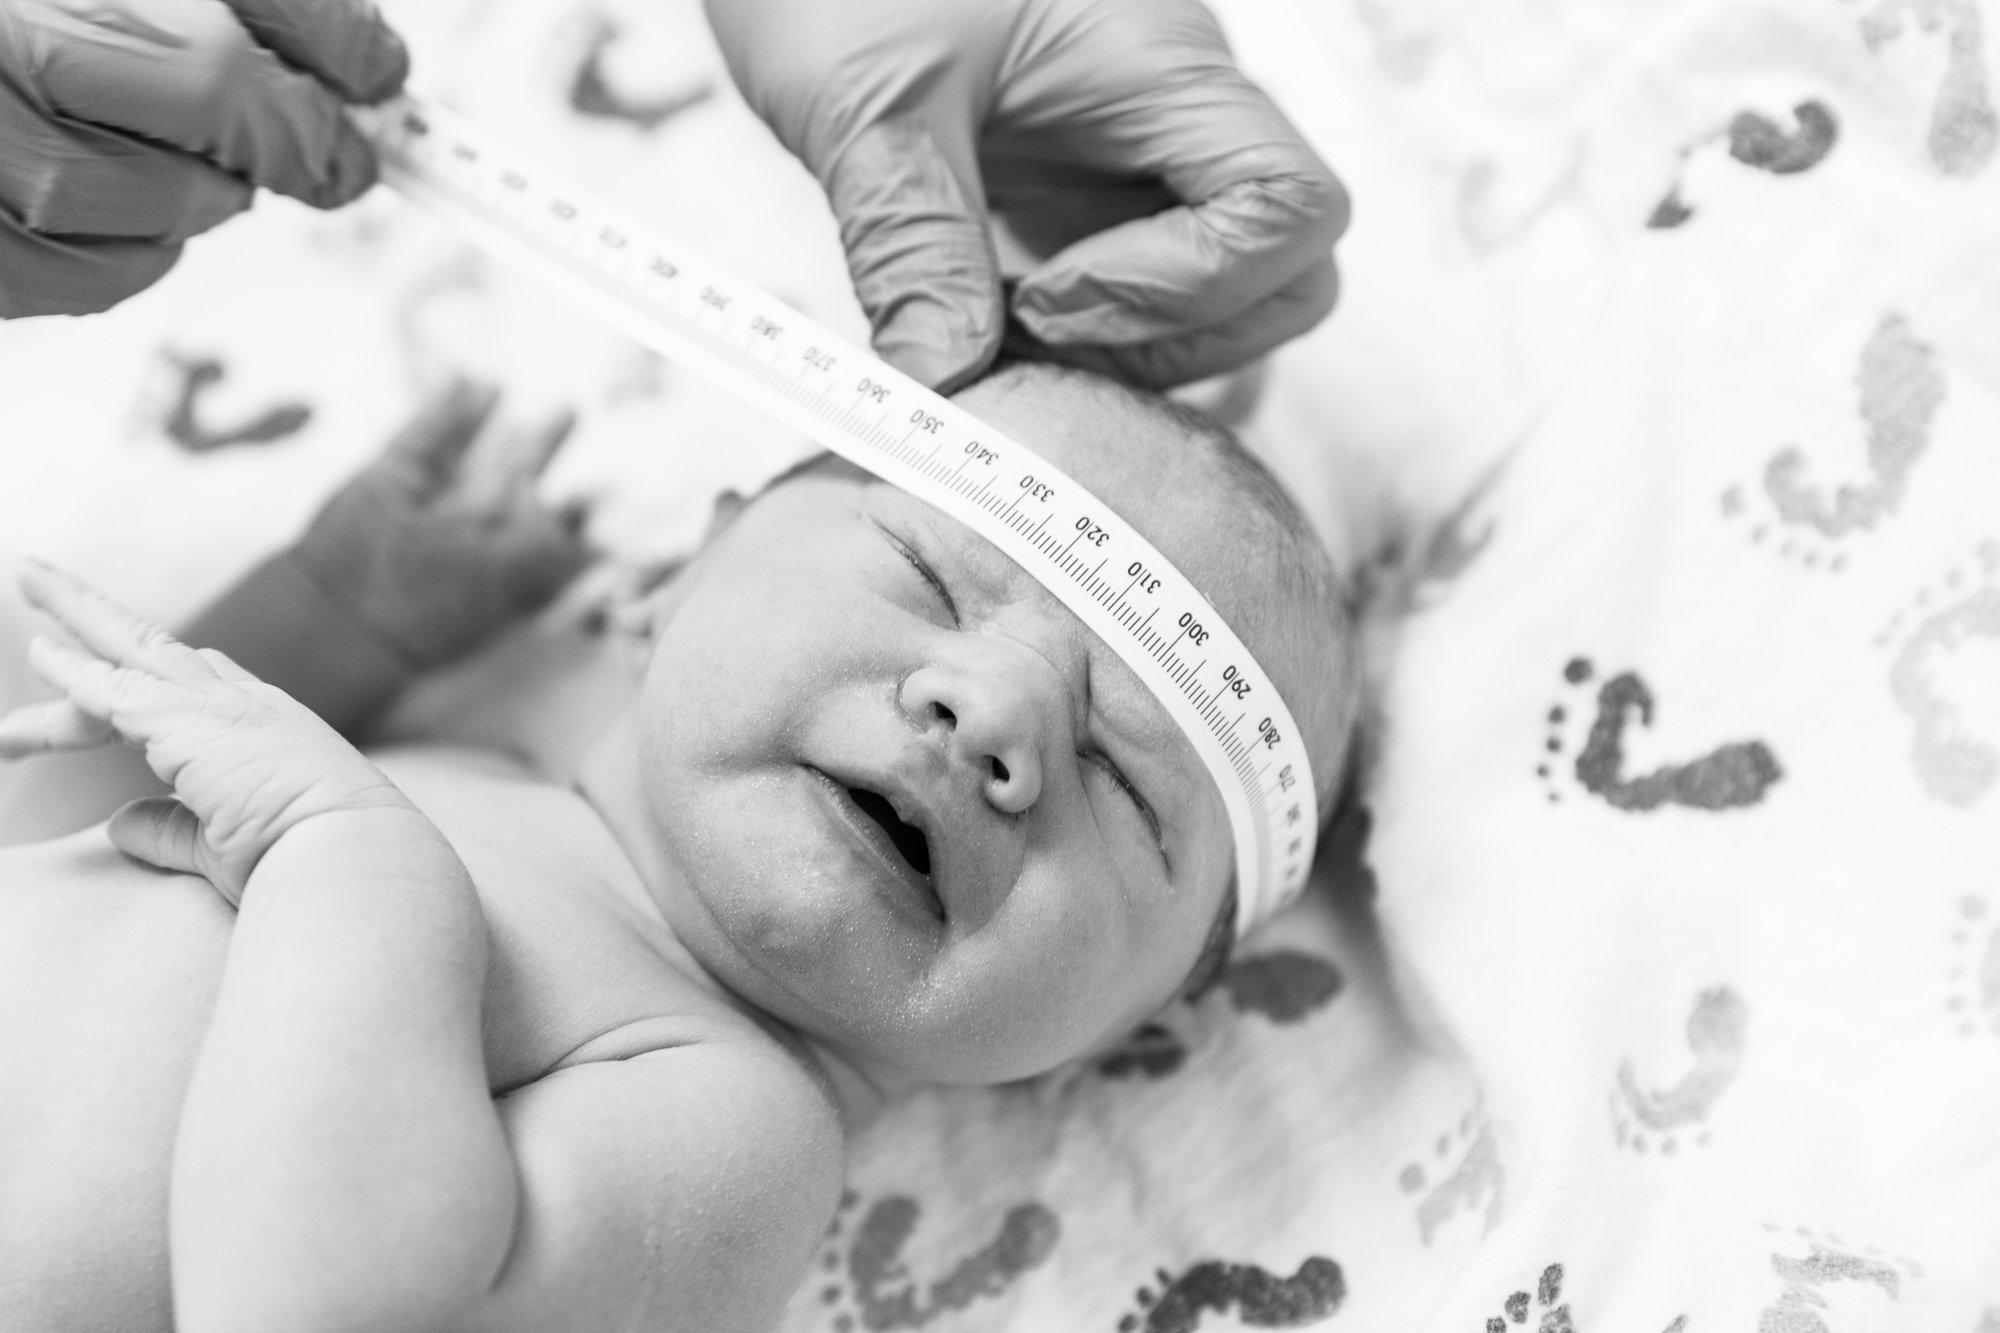
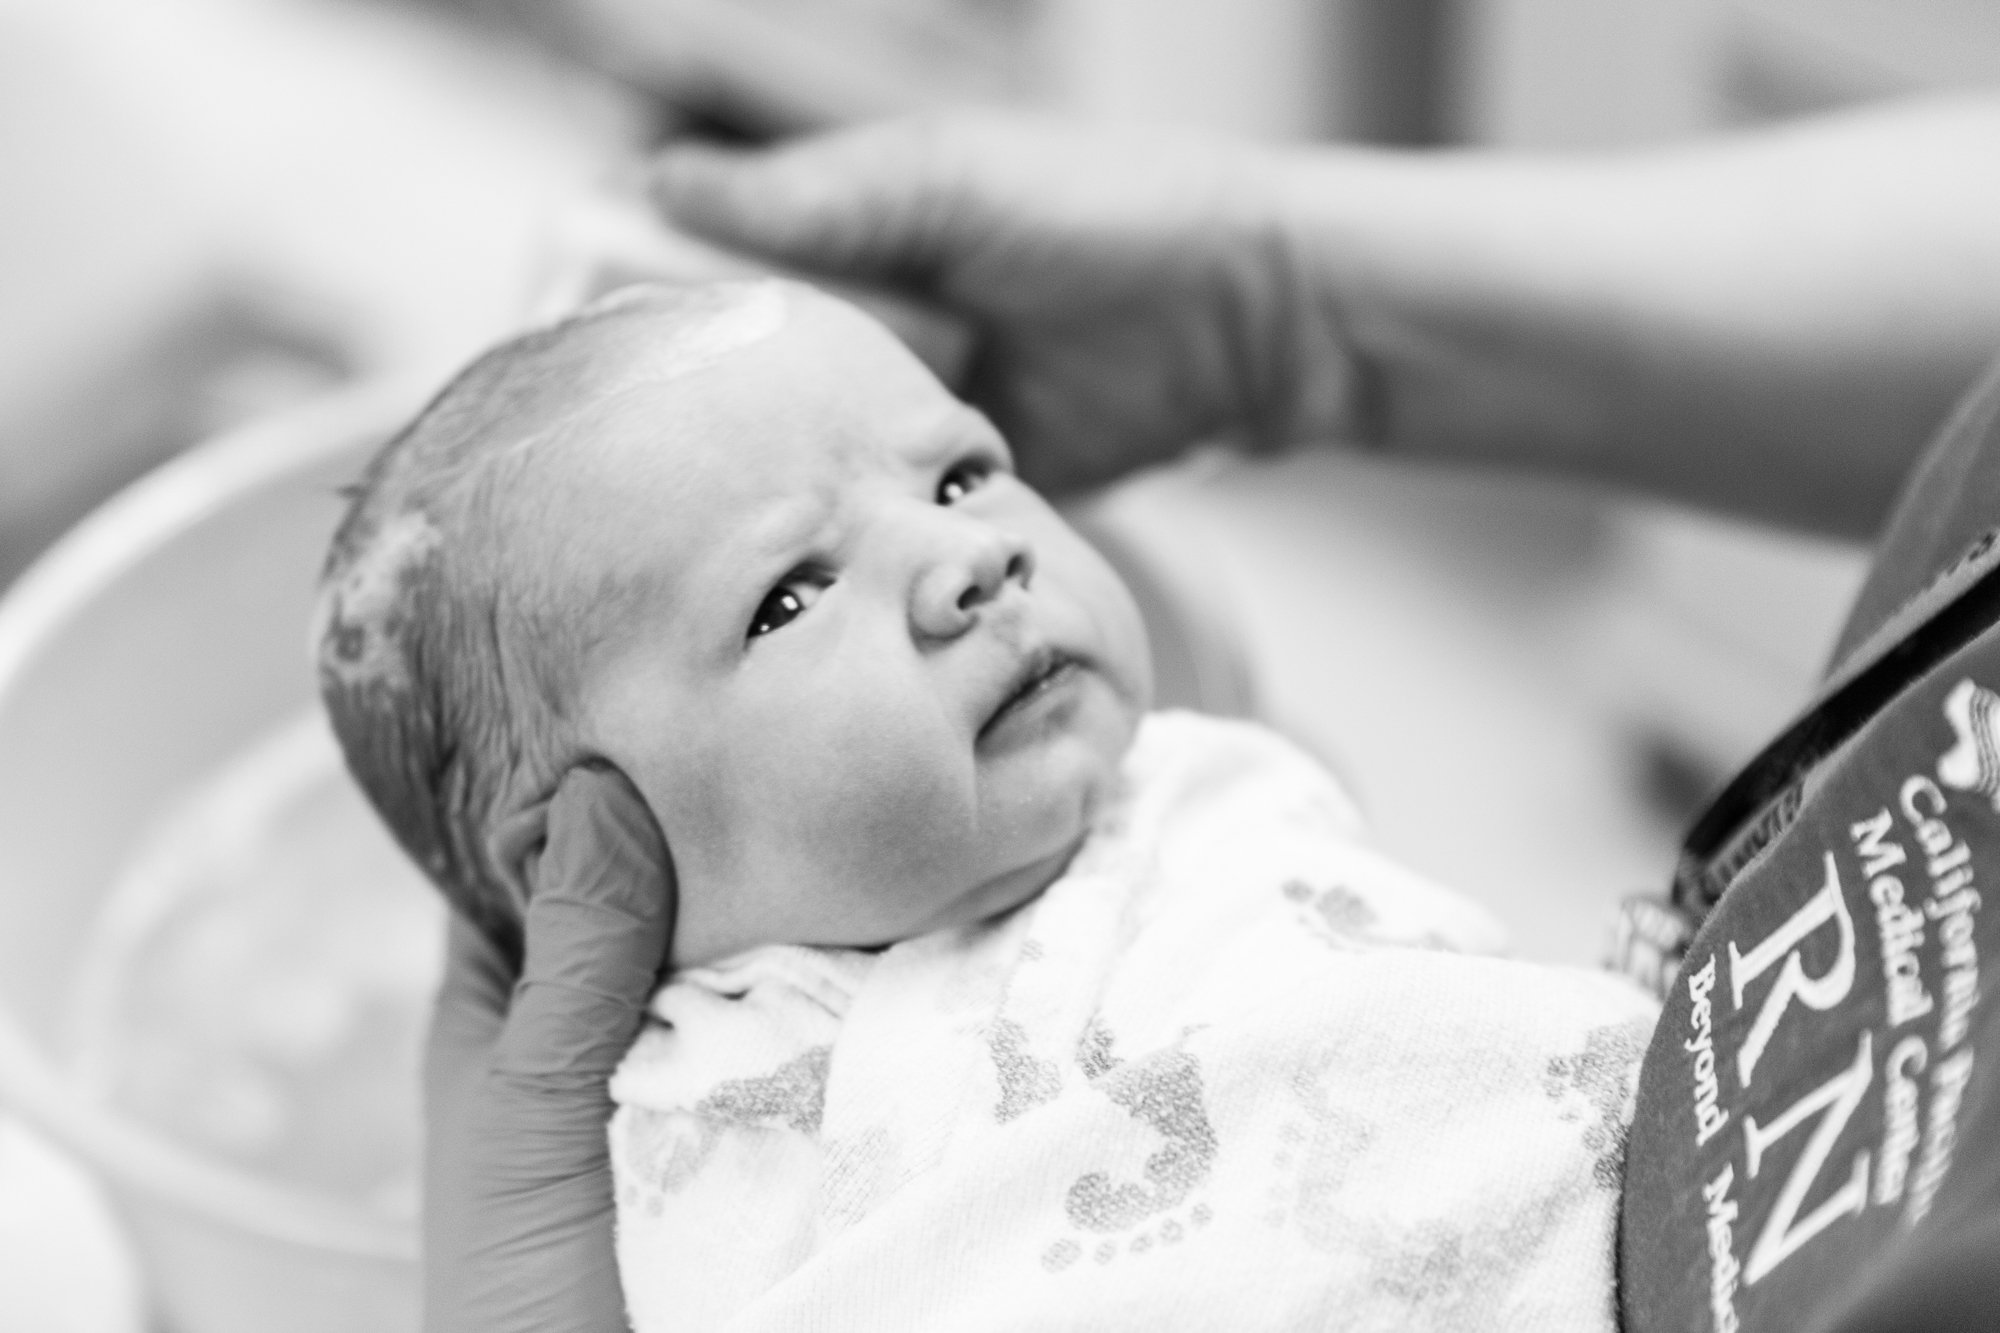
6. Follow the baby
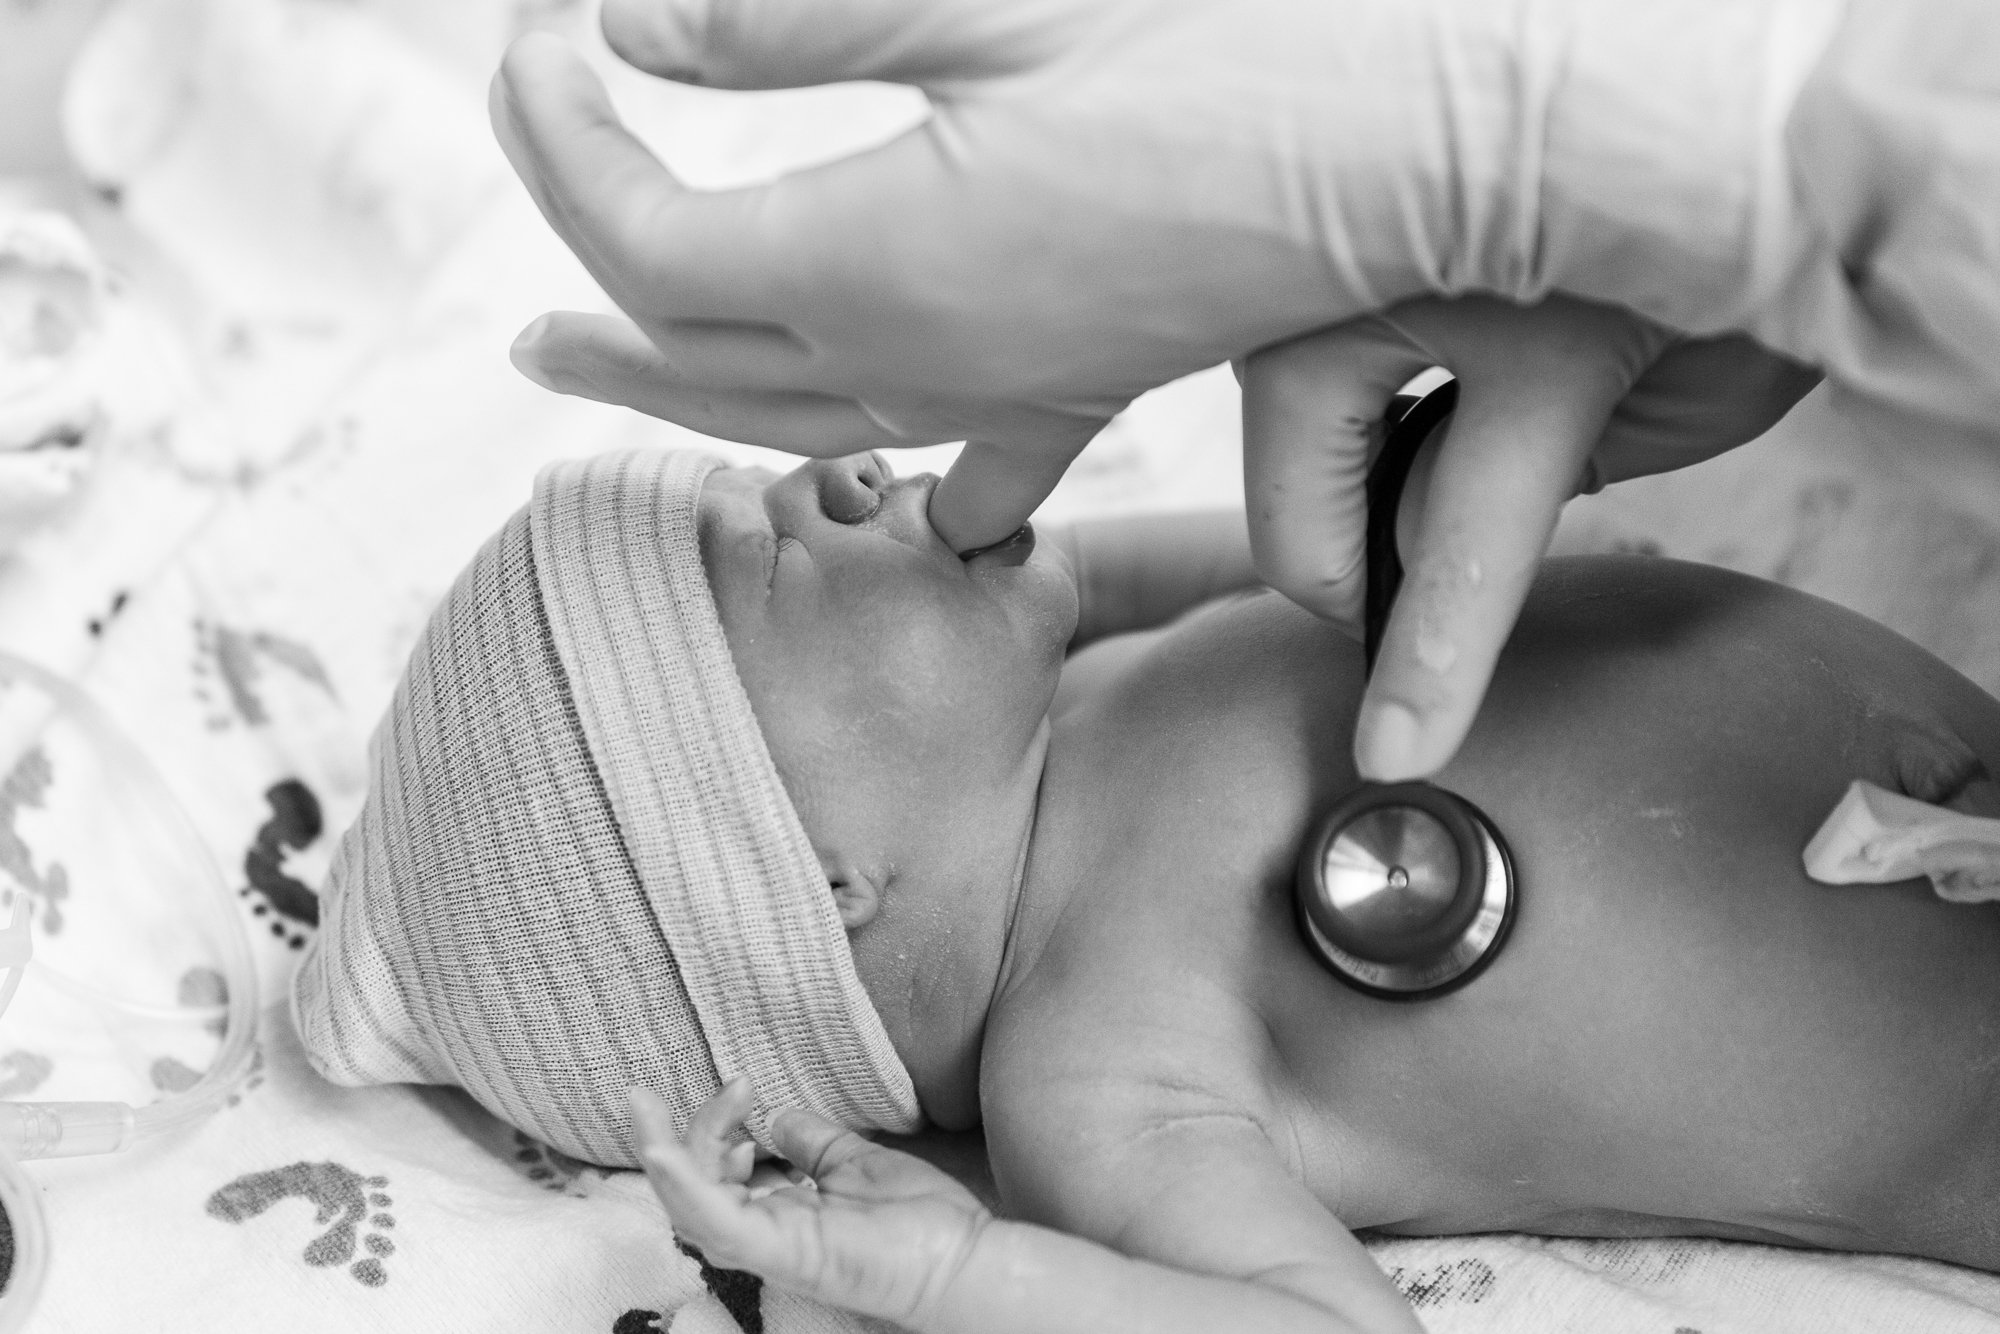
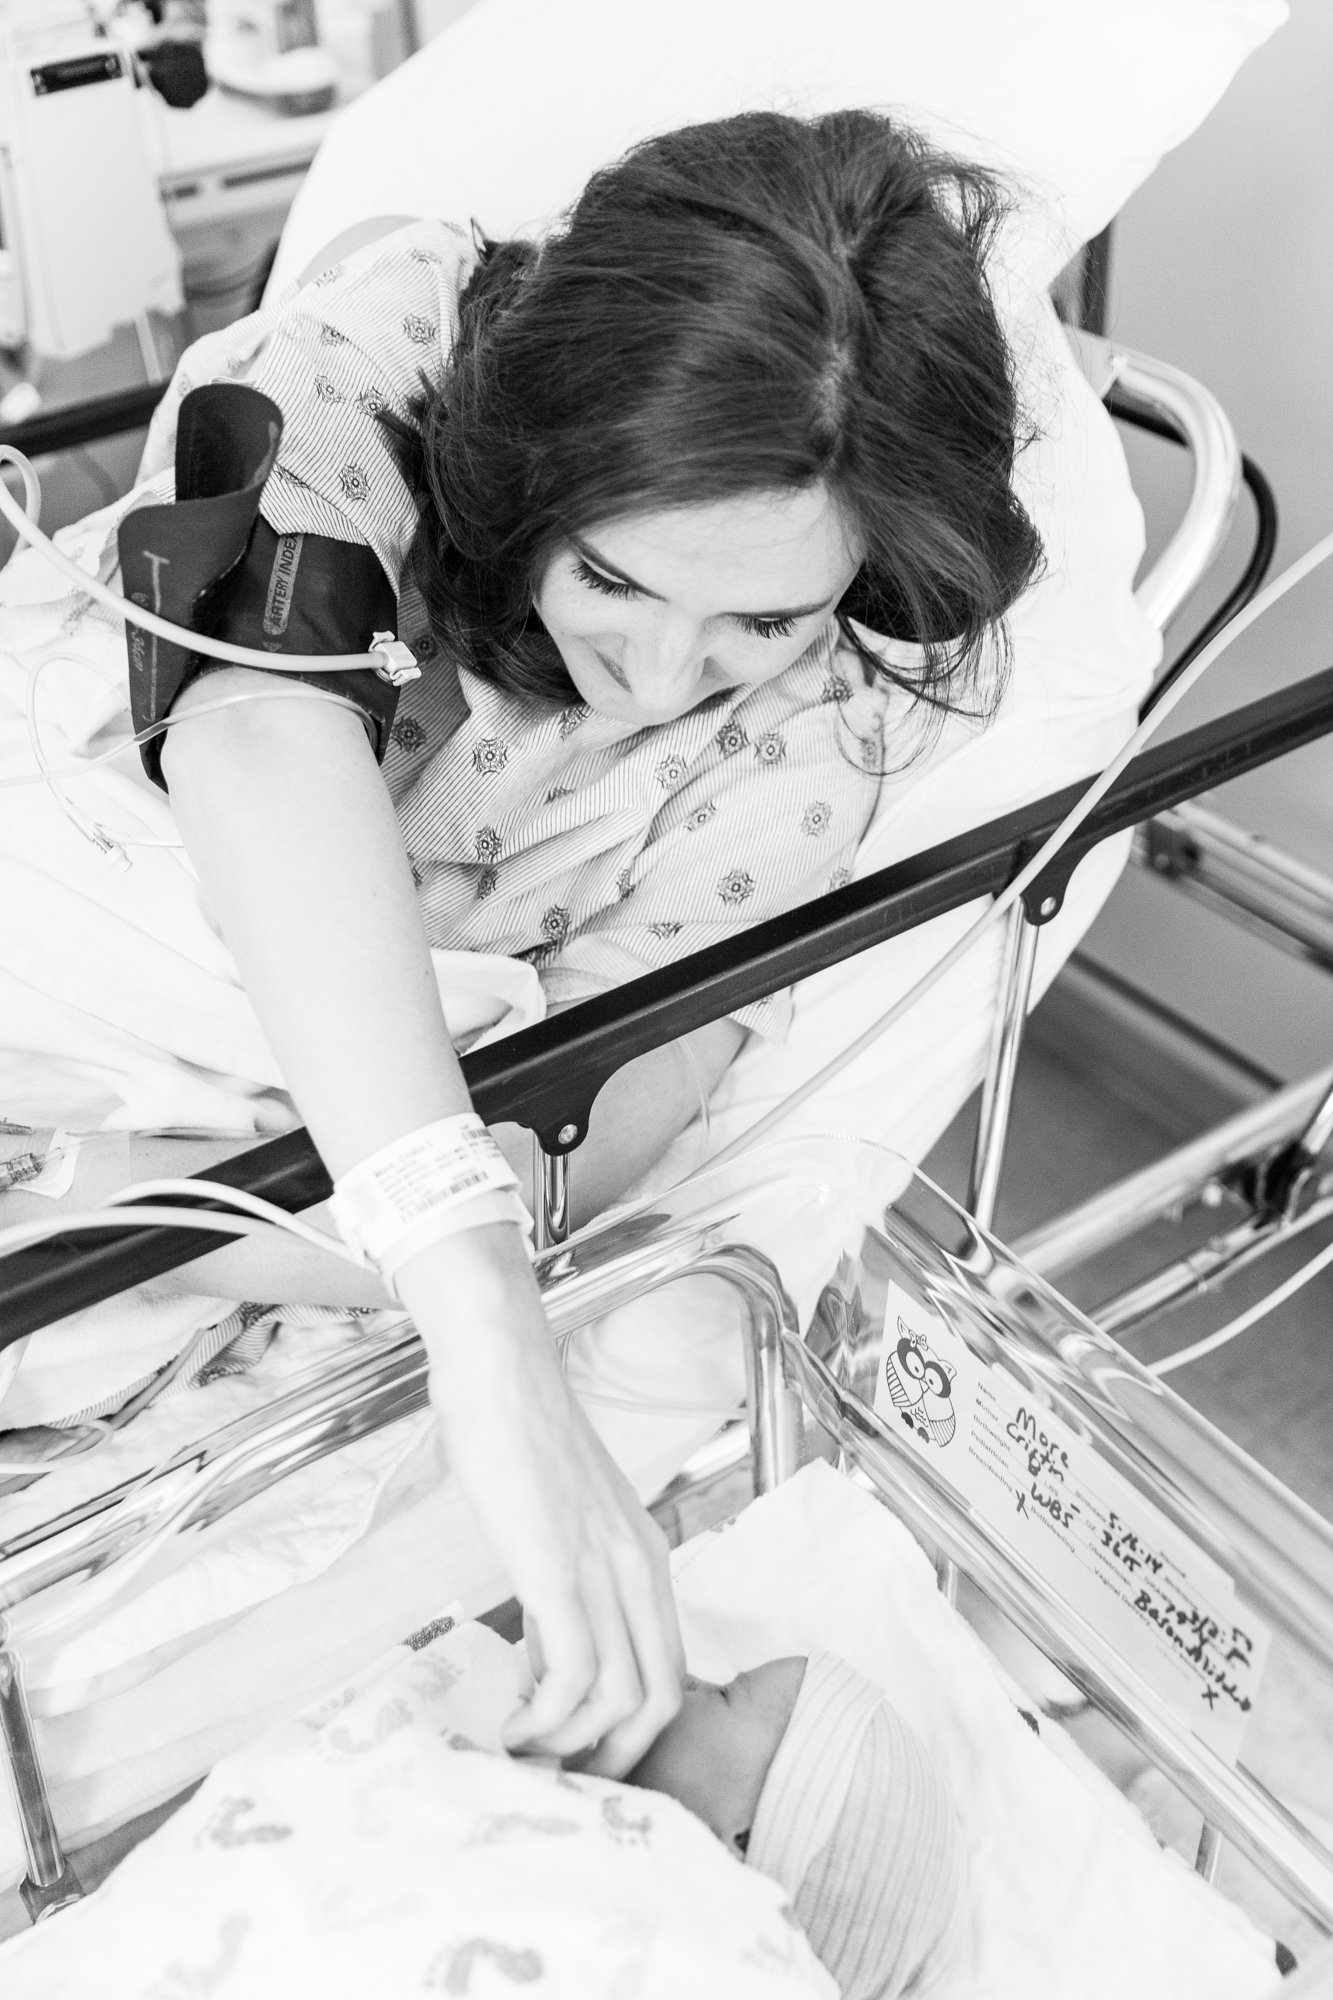
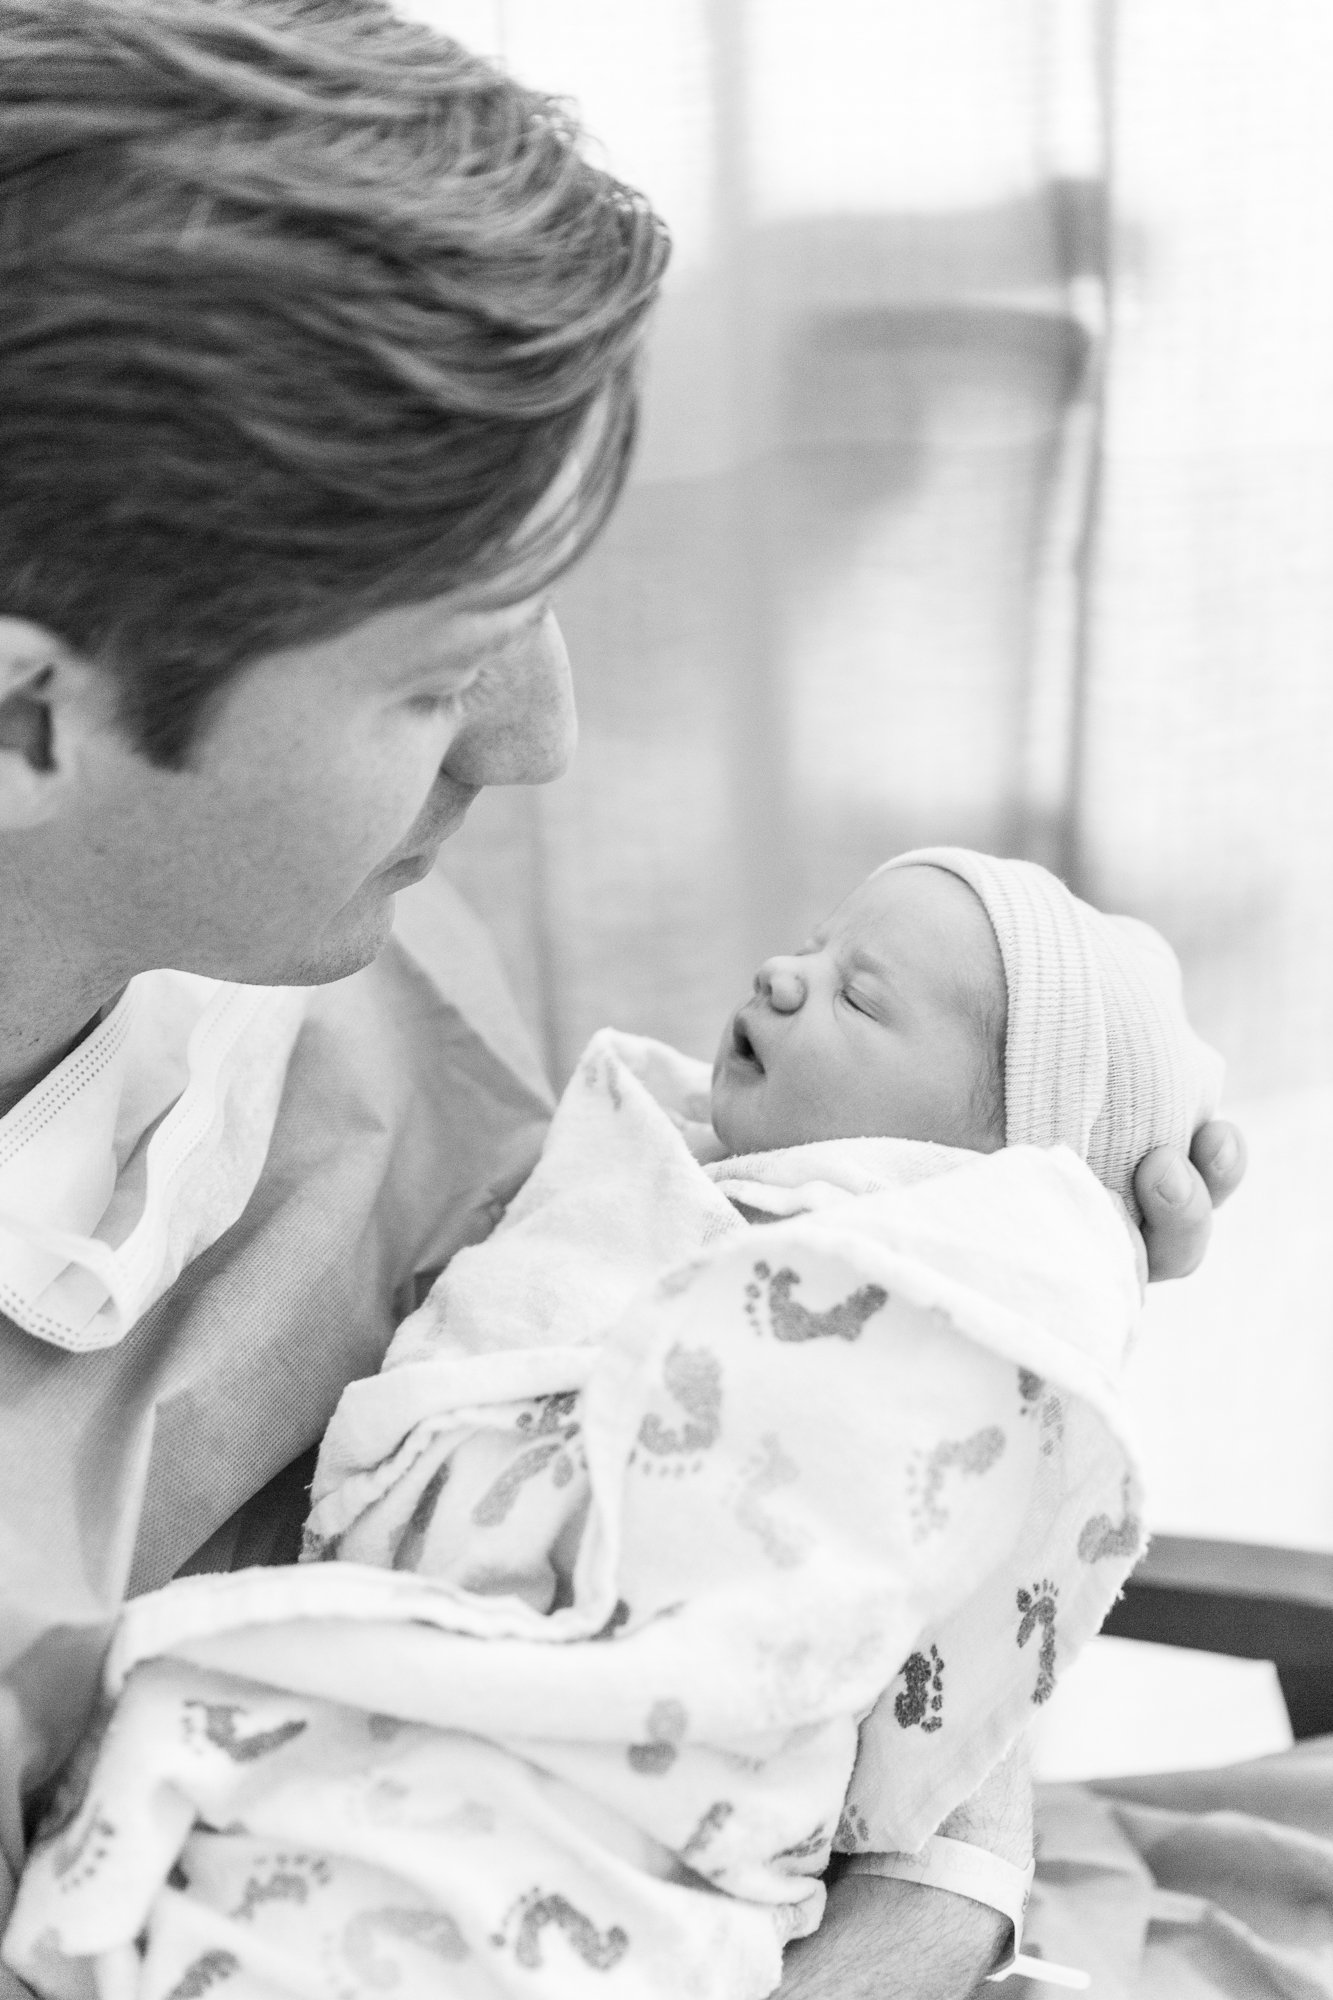
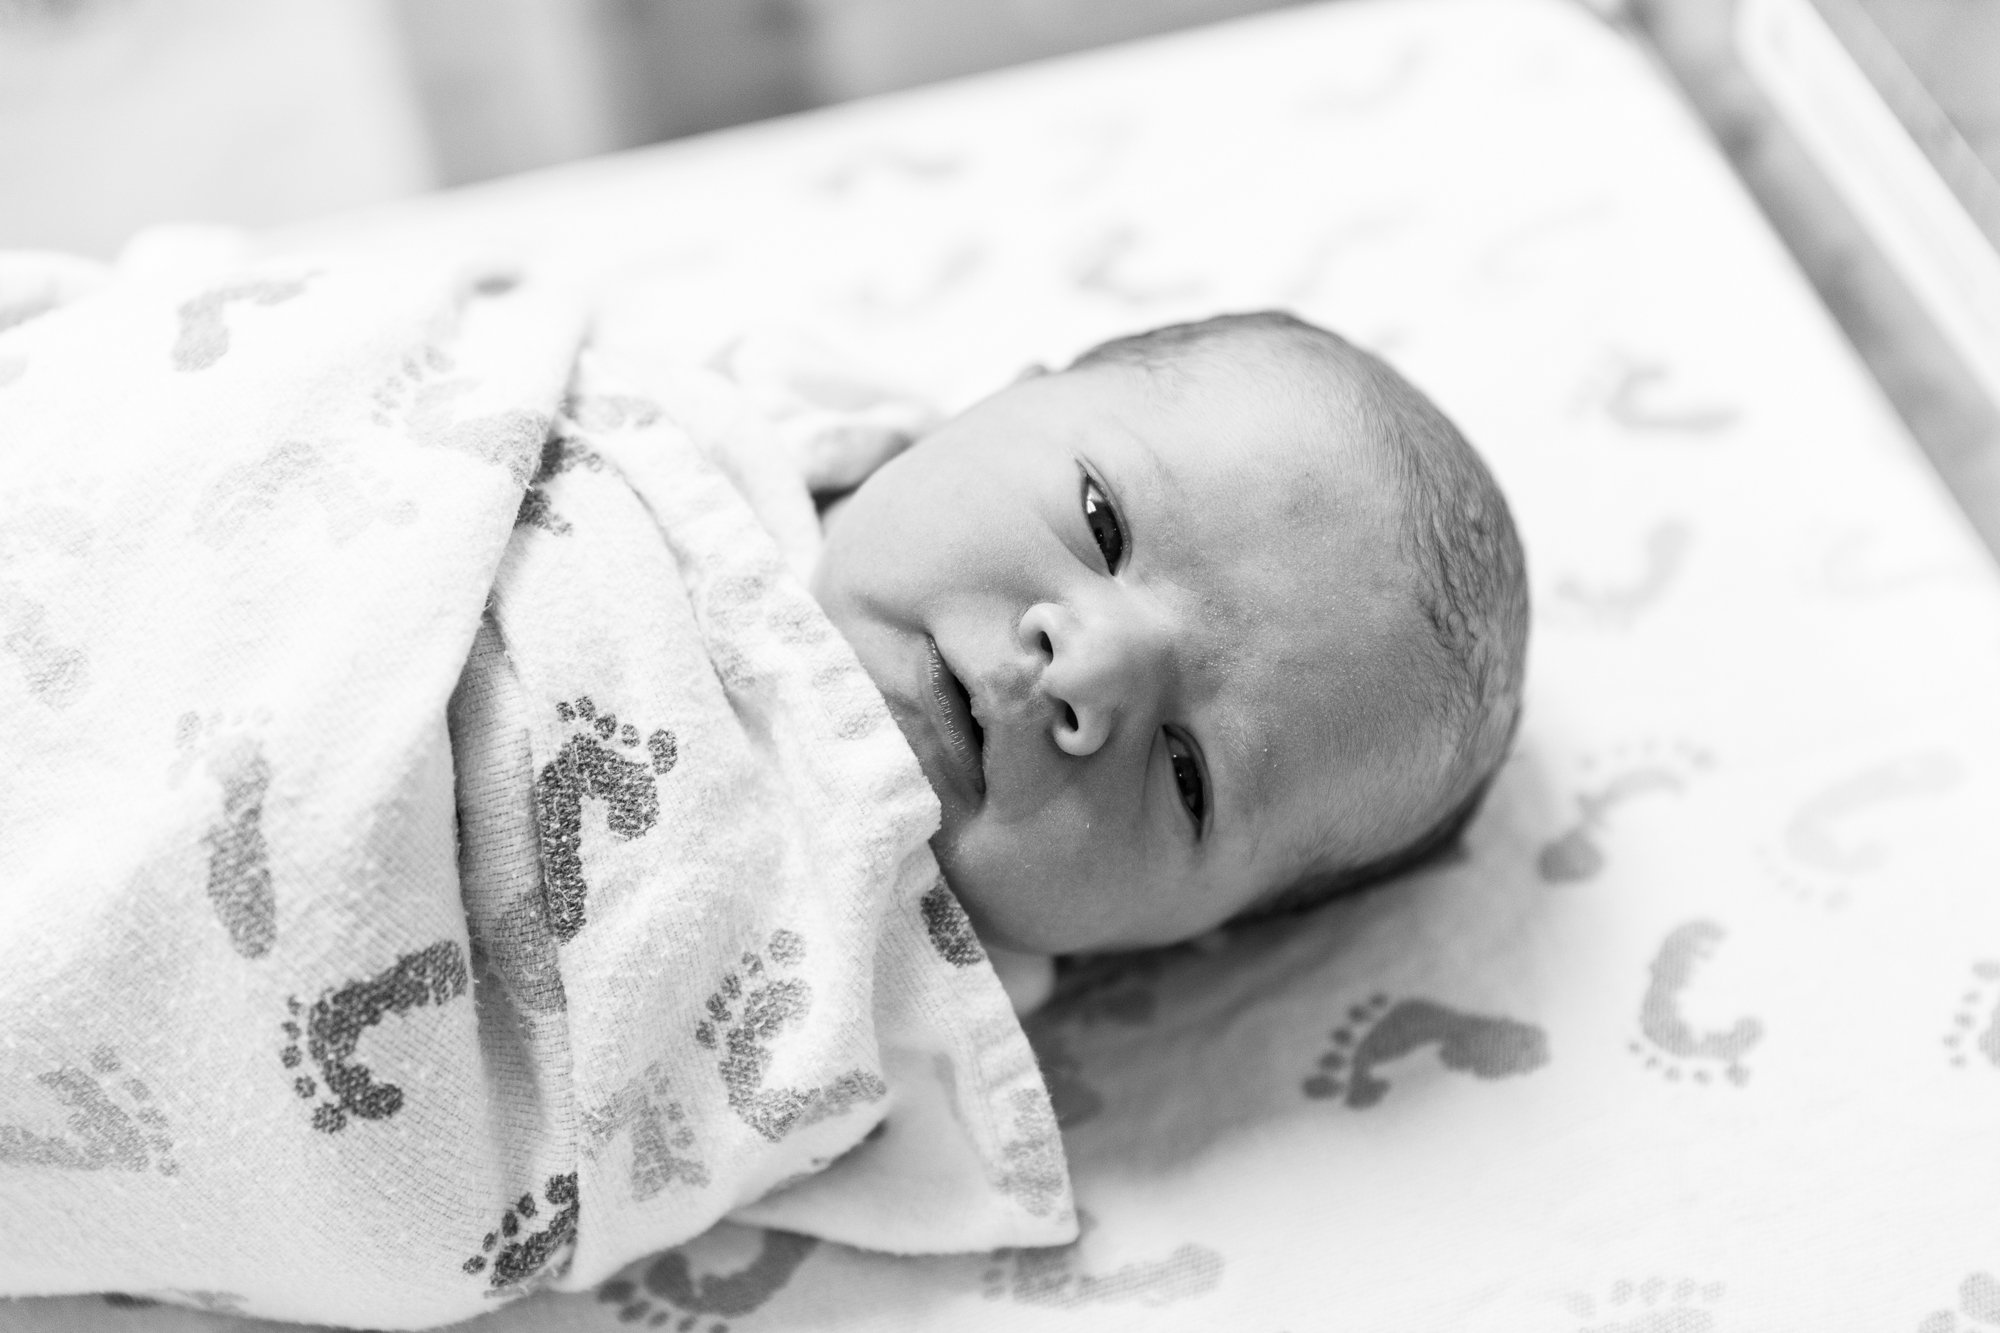
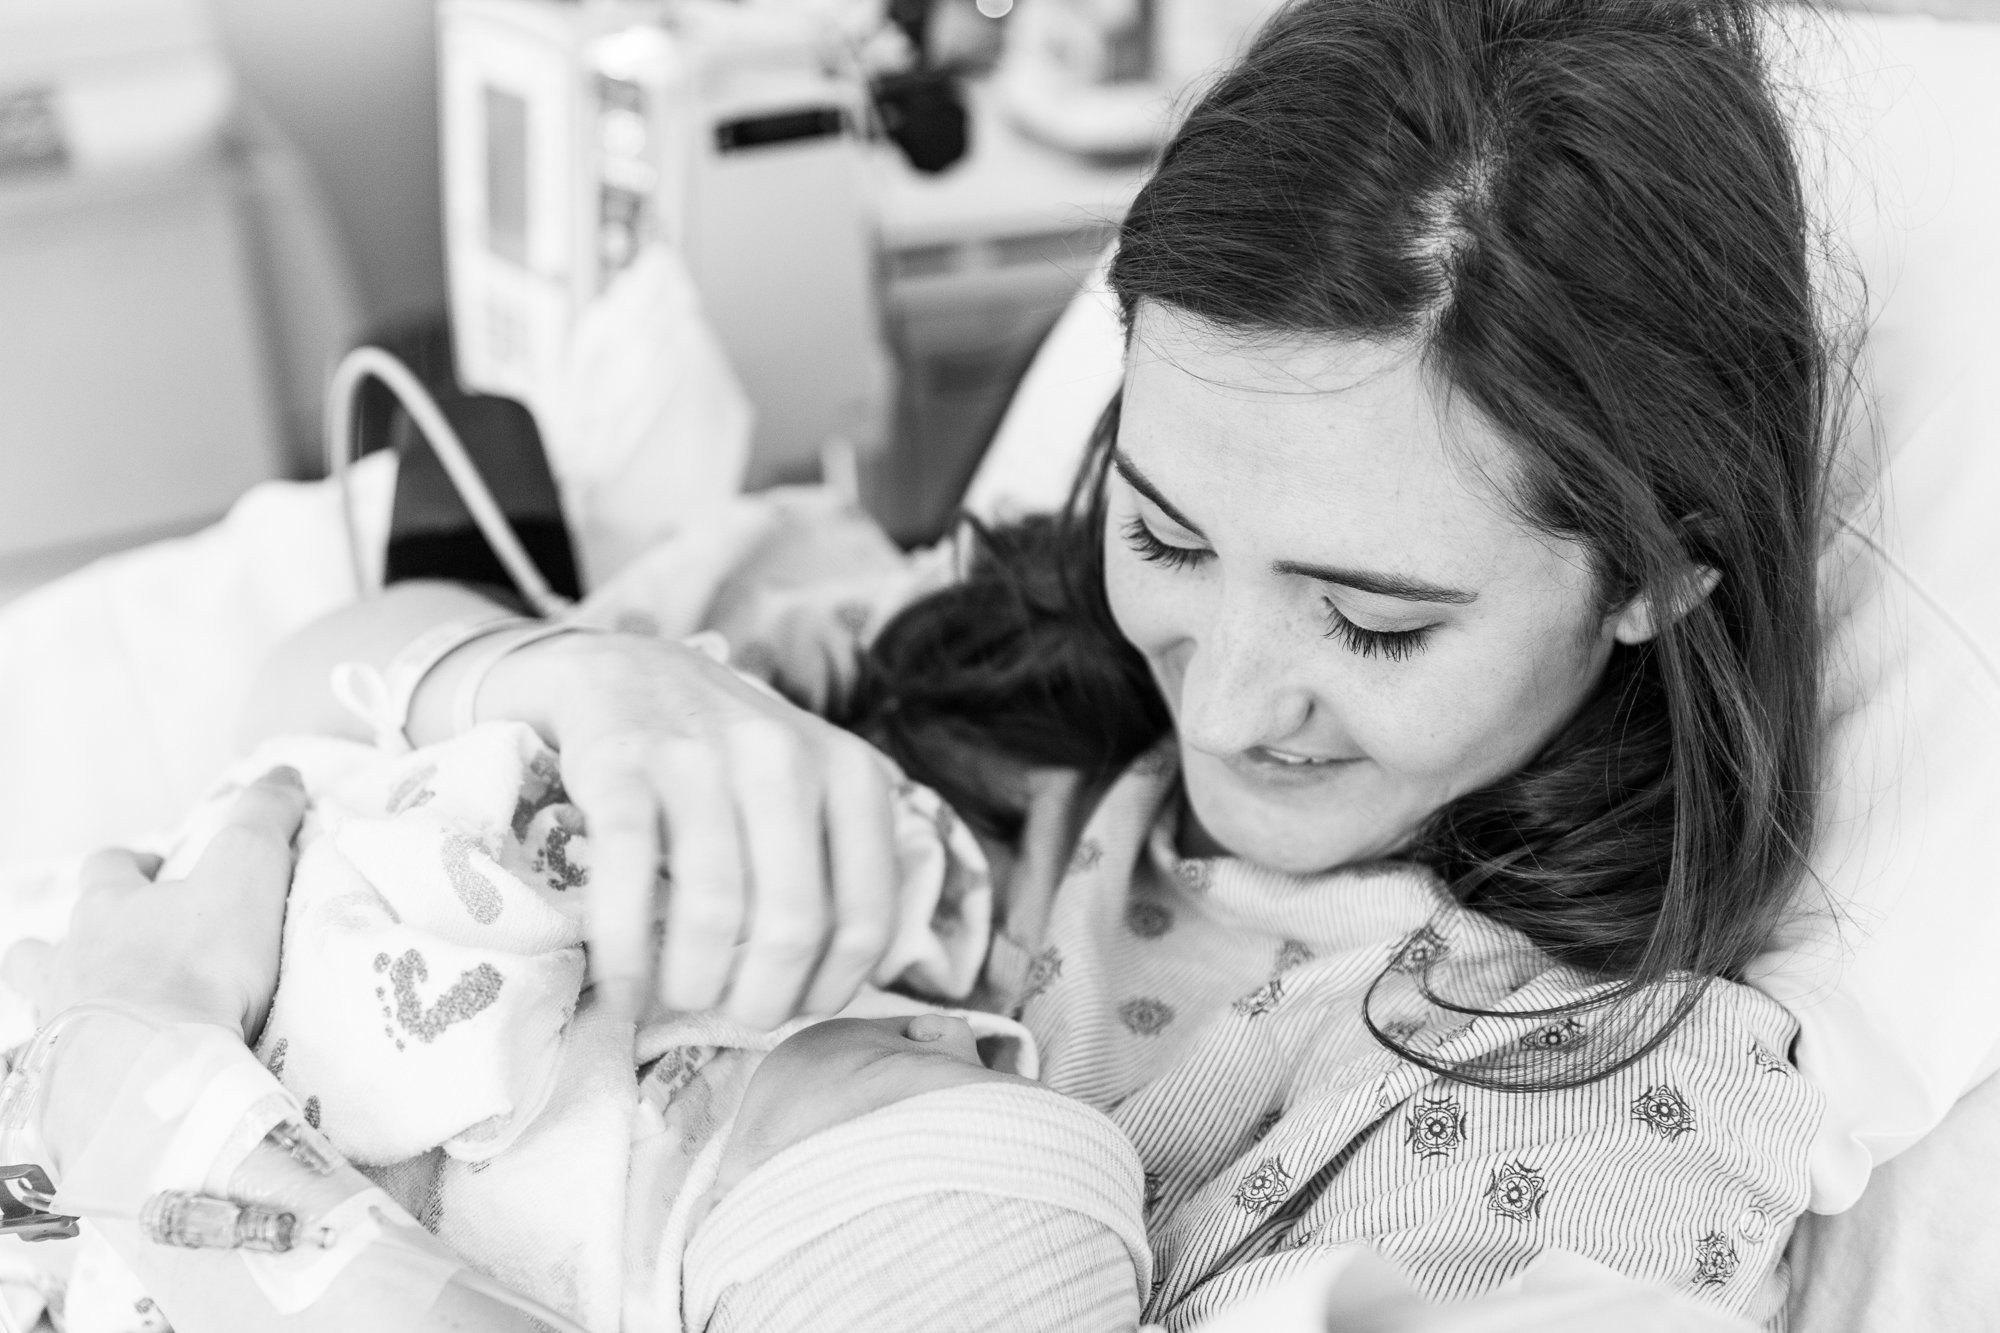
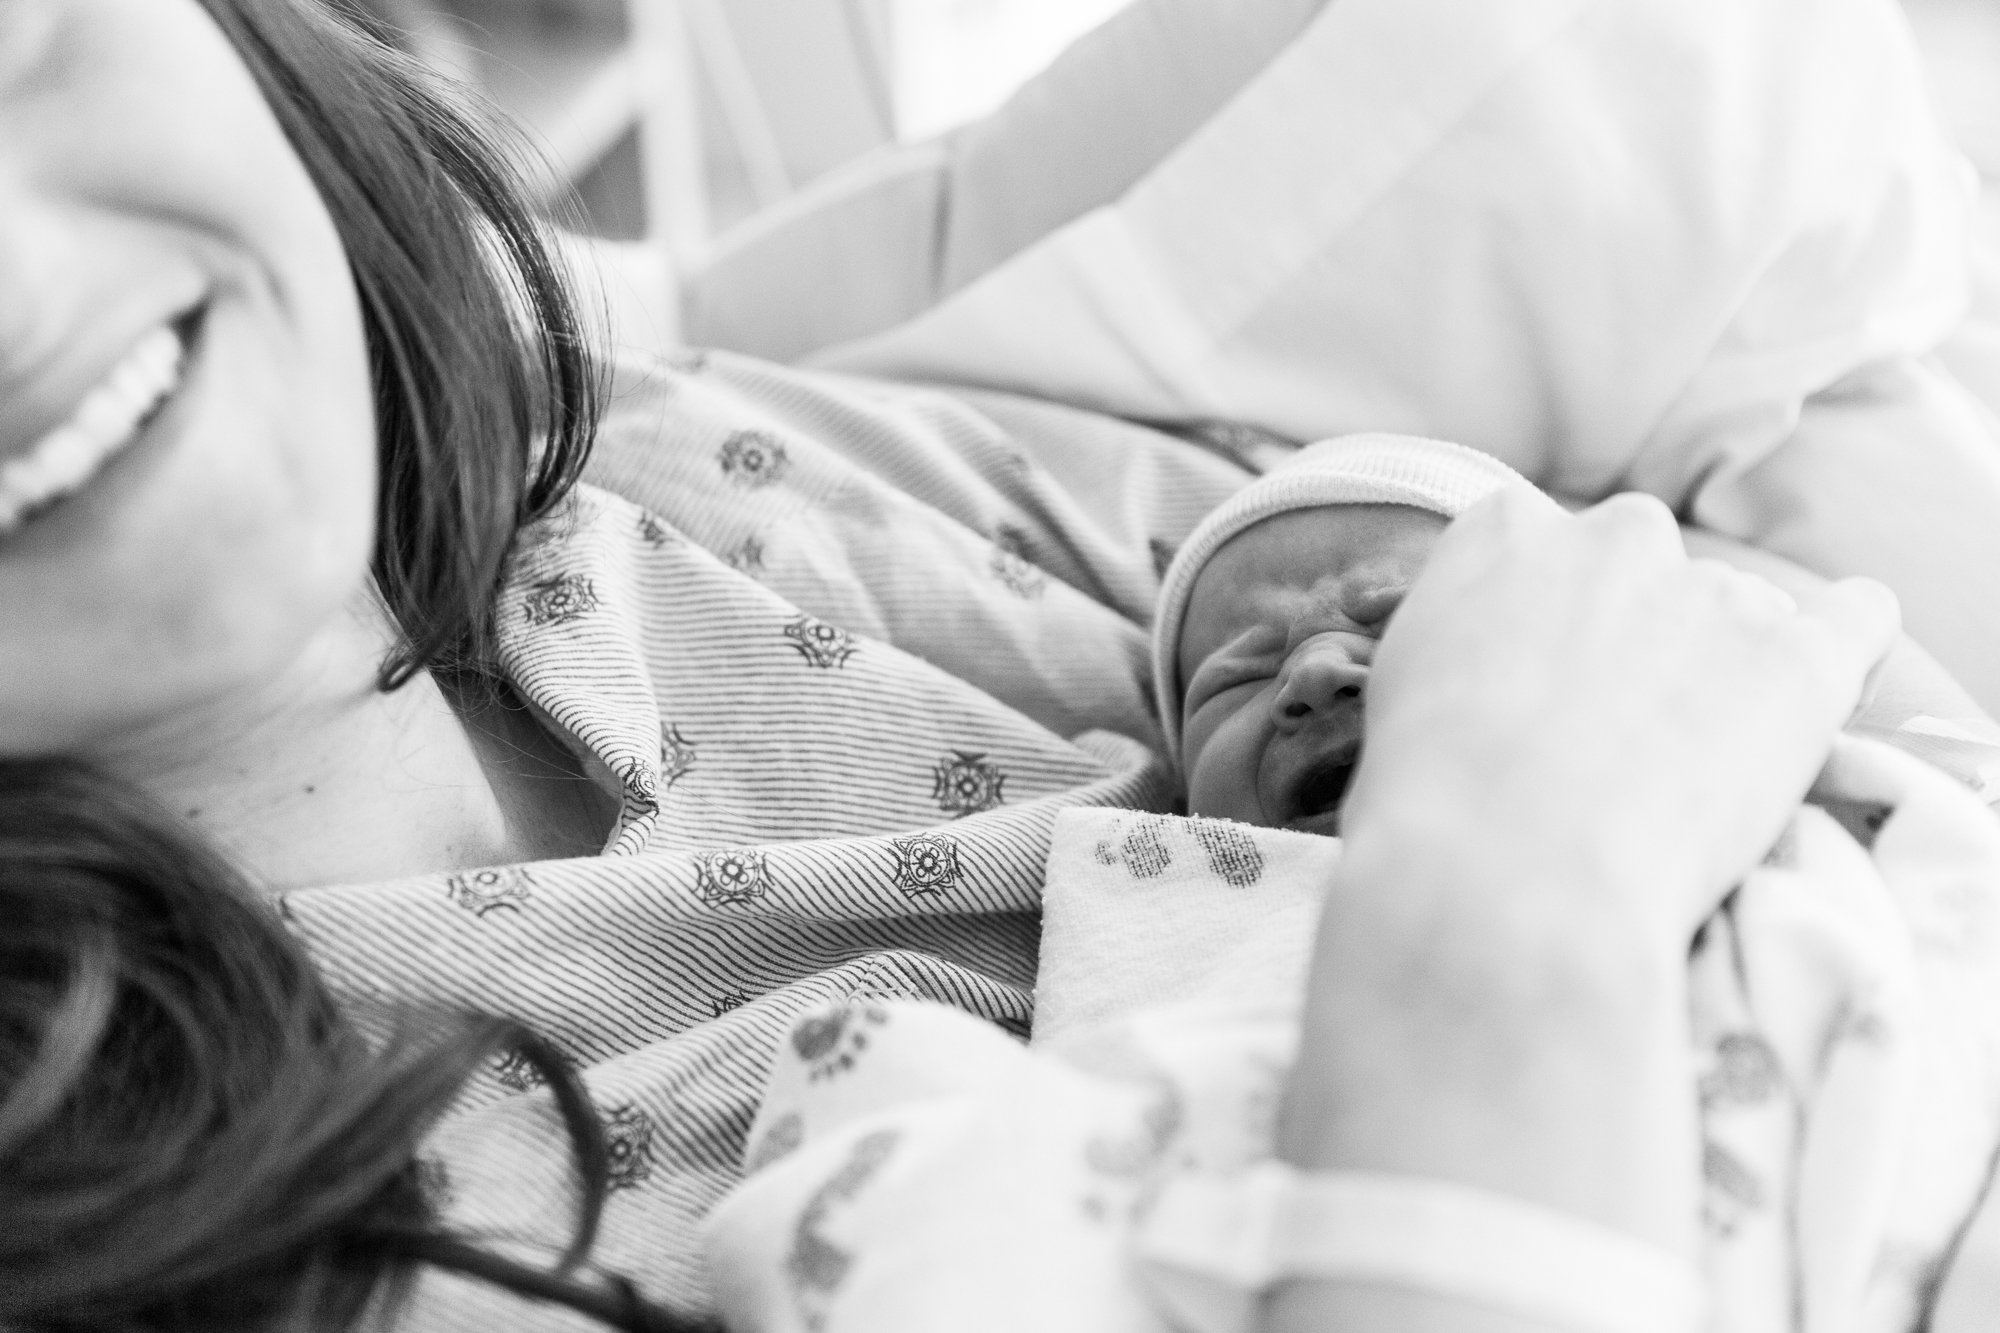
I know it's a personal decision as to whether your partner will stay with you or go with the baby, but I sent my husband with the baby! Most OR's will let your partner take photos. I would always ask when you get in there, but my husband was there taking the first photos right after, my daughter was taken out. He was able to photograph her getting dried off, suctioned, weighed, her first bath, the whole nine. He even got a photo of her being transported to the nursery from the OR. I was not present for a majority of those moments as I was getting stitched up and wheeled into the recovery room, so I will always be thankful that he got such great photos of those moments.

7. Edit
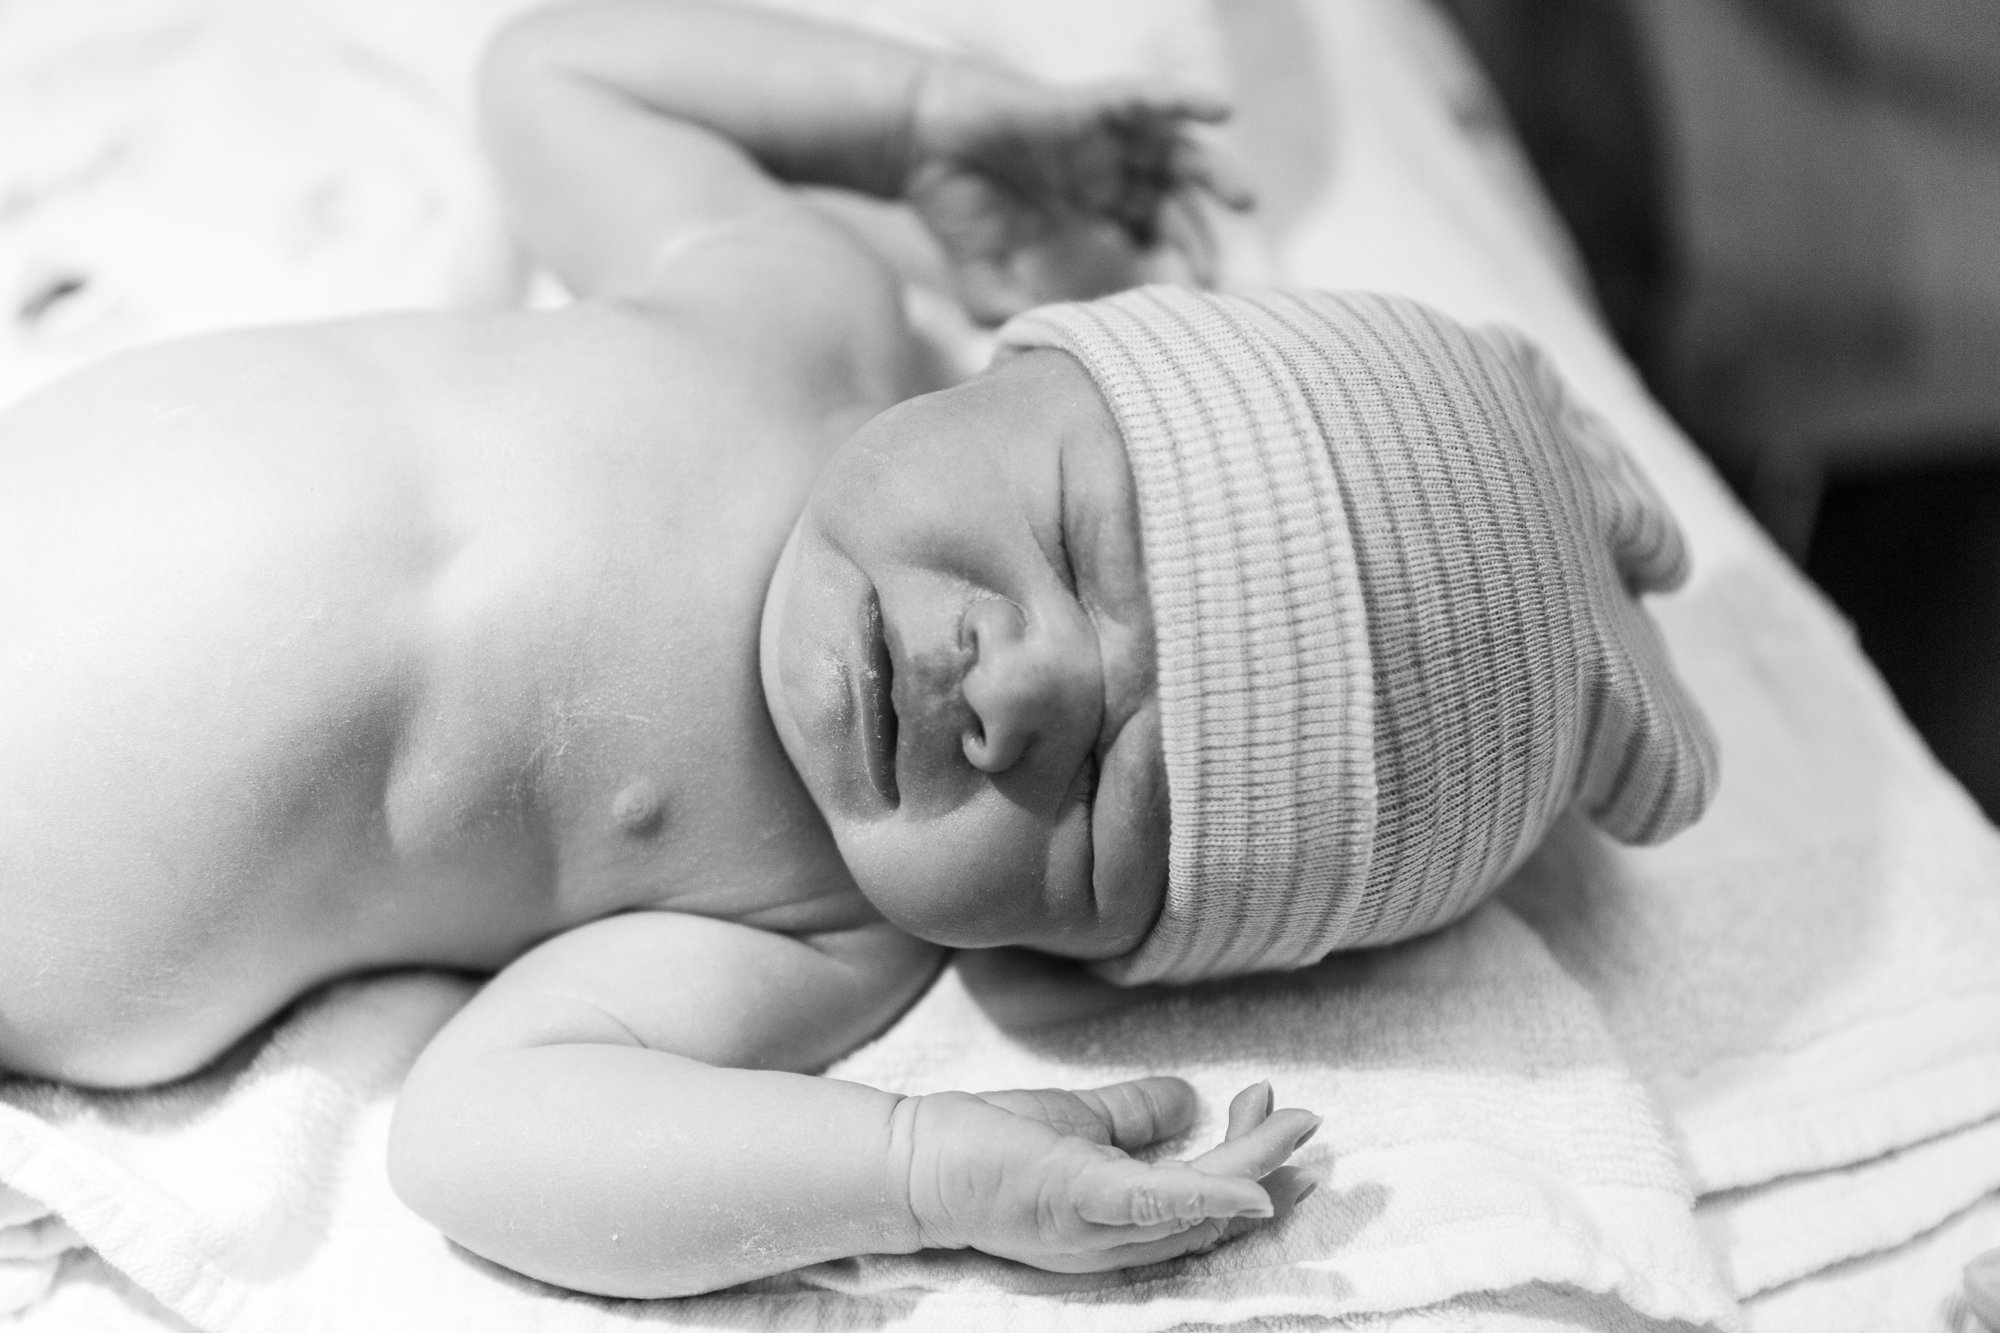
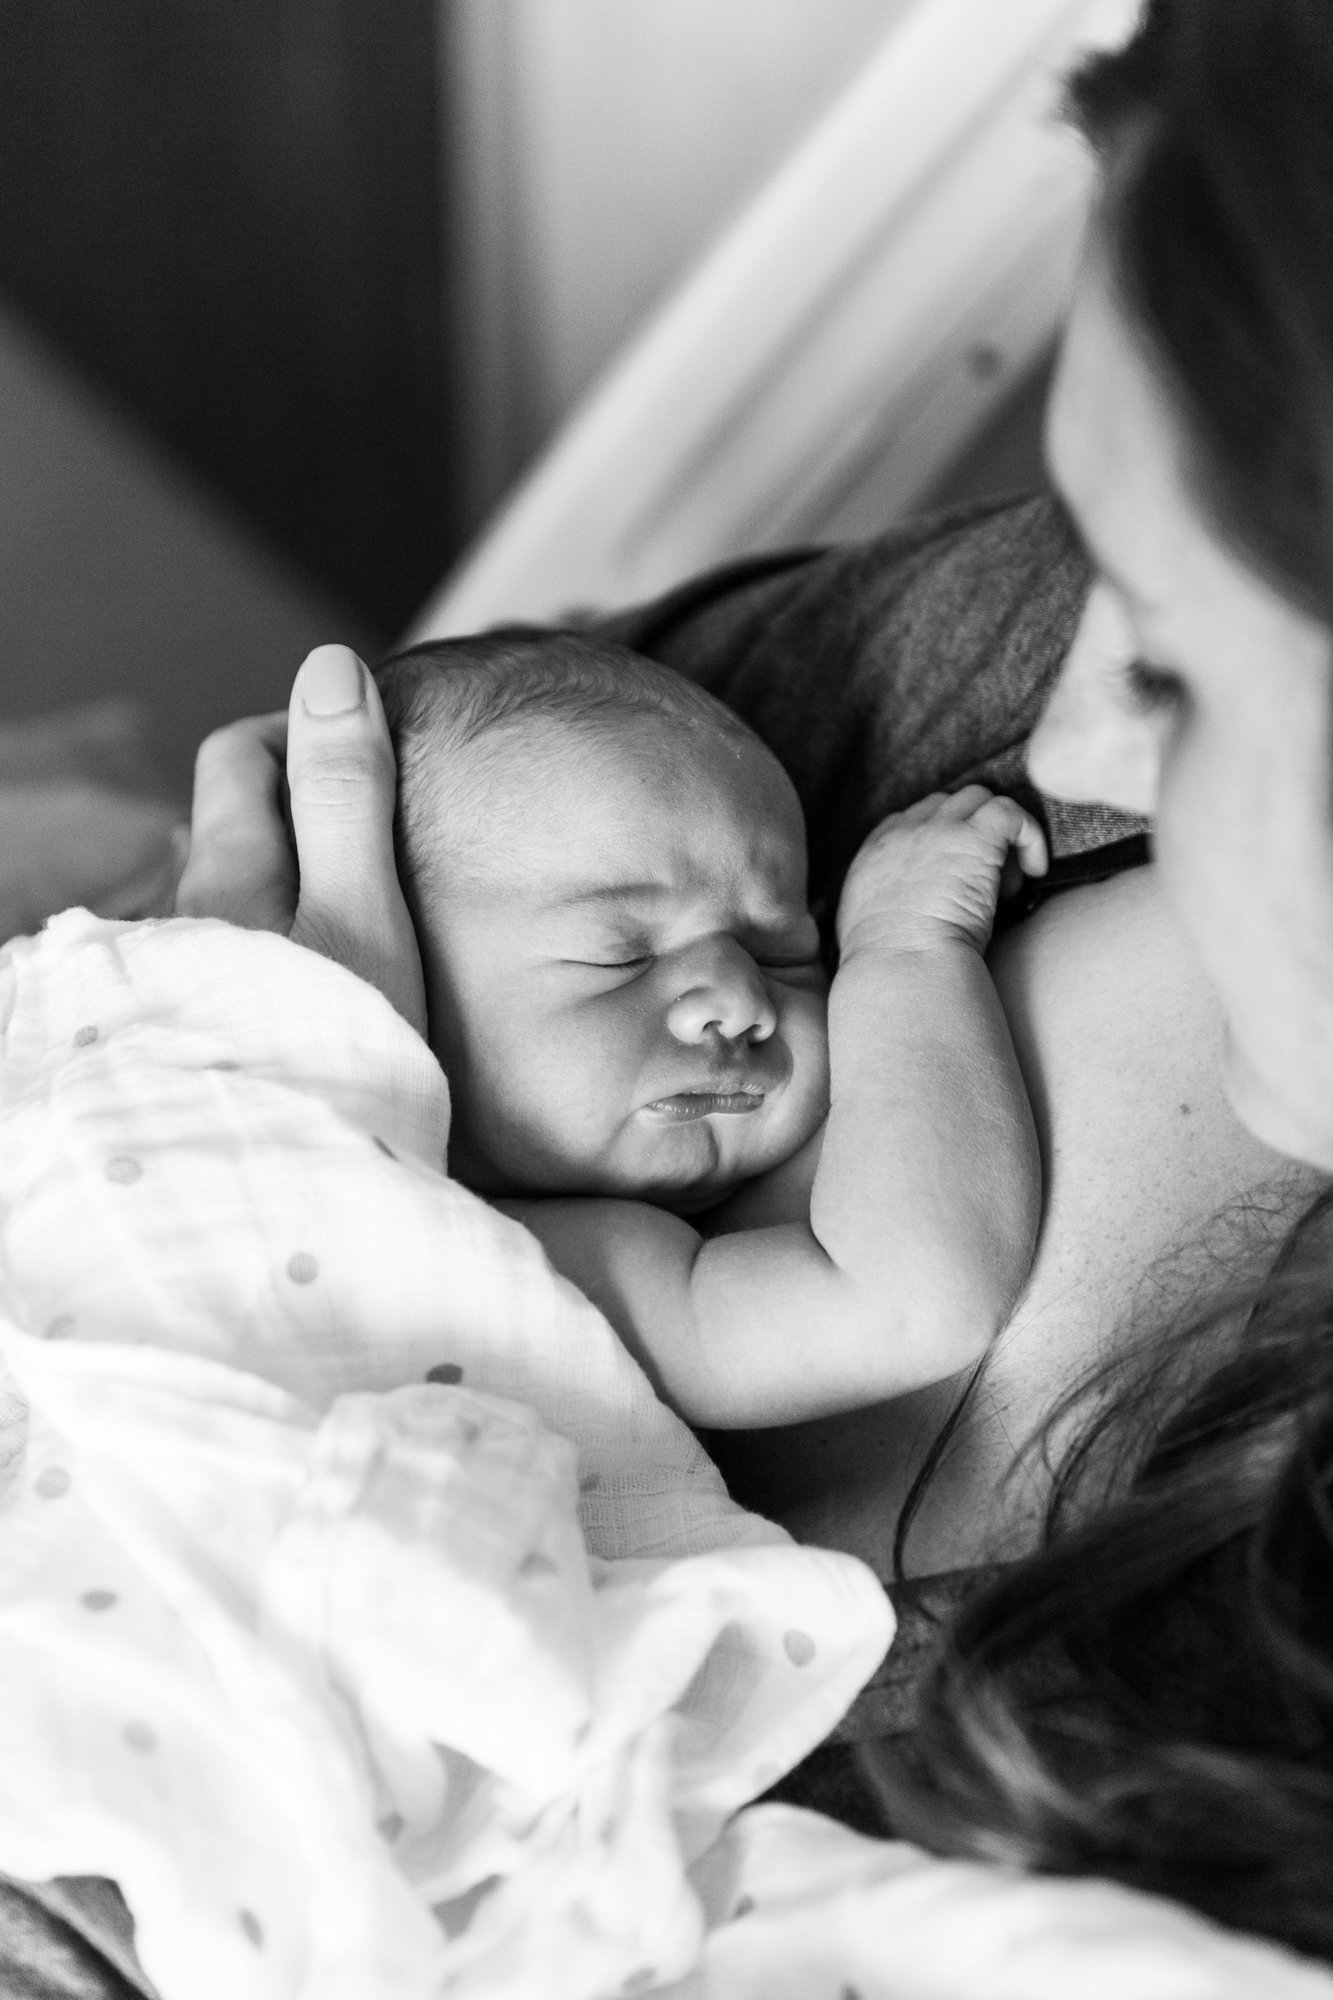
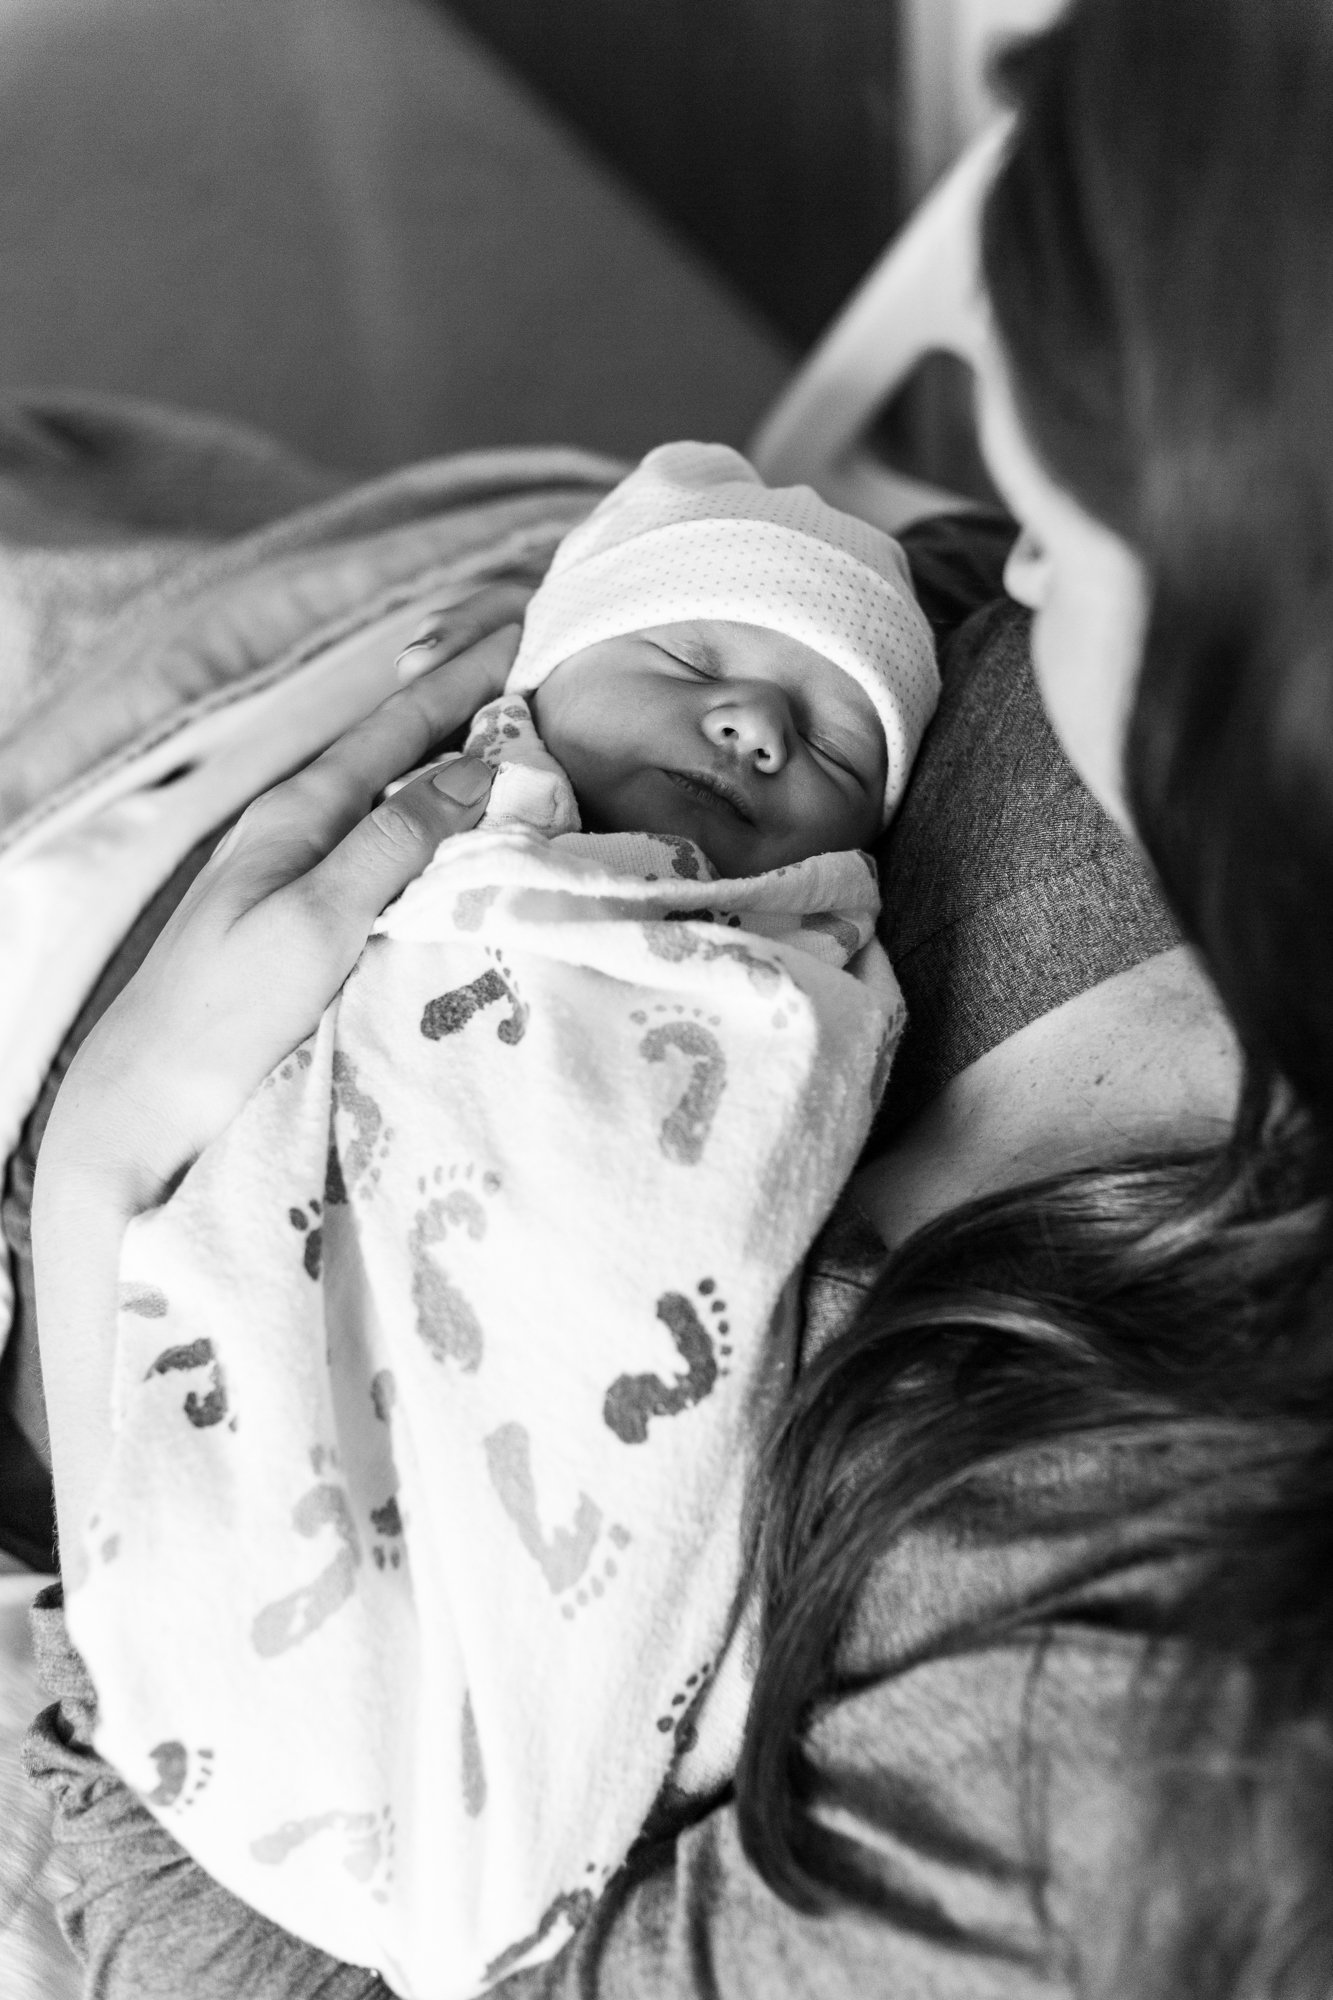
I know most people do not edit their photos, and that's fine! However, OR and hospital lighting is notoriously terrible. At a minimum, you will need to correct your white balance (the color of the photo), and most likely your exposure (the brightness of the photo). You can do this easily with programs like iPhoto or Picasa and find all kinds of tutorials online, and if you want to get really fancy, Lightroom is a fairly intuitive and easy to use program that's powerful enough that most professional photographers have it in their arsenals. We include presets, include the black and white one used for these photos, in our online photography class for parents Capturing Everyday Magic, to use with Lightroom that make everything easy-peasy. Editing makes a huge difference in picture quality and investing time into making the photos the best they can be is time well spent for your child's delivery day. It doesn't have to be done right away, or even in their first year, but I would recommend doing it at some point. I would also recommend having one set in color and one set in black and white. There is a reason birth photography is usually black and white, and that's because is much more flattering. Babies are usually red or yellow, covered in goop, the lighting is harsh, and the color of the lights is rarely flattering for the people in the photos. I have my photos in color just for my personal use, but it took a lot of time in post-production to get the colors right, and the black and whites are much more beautiful and timeless.
I hope these tips helped you feel more confident in taking your own DIY c-section photos. Some of these may not apply to everyone because all of our births and how much time we have and our mindsets during those times are all different, but most of them can be applied to every birth in some way, and definitely to the hospital stay after the birth.
I hope it also goes without saying that you absolutely do not have to get photos of every moment. Make sure you take in those extra special times for just you and your support people and this new life you created. Pictures are incredibly important to me, so I wanted to document a lot of it. However, while it may look like we got every moment, there were plenty of times we put the camera down and just soaked in the moment.
If you are really wanting to up-level your photos, our course, Capturing Everyday Magic, your guide to taking better pictures of your kids and getting in the frame, is the perfect place to go!

A huge thanks to my husband for taking these photos, and for putting up with my incessant pestering to make sure he knew how to use my camera in full manual mode for my delivery.